Pages

Sunday, October 31, 2021

Happy Halloweeen!!

 Happy Halloween everyone!

Check out this cute witch card.
This is a fun fold card.....
and here is what it looks like when you start to open it up.
This is what it looks like opened up all the way.
Look how I punched out the words.......
I stamped the words onto a 1" strip of Basic White card stock
& punched it out using the Everyday Label Punch.
And then I layered them onto a Basic Black full sized Everyday Label Punch.
Here are the supplies & measurements.
stamp set:  'Frightfully Cute'
card stock:
  • Basic Black- 4 1/4 x 5 1/2"- for card base
  • Basic White- 5 1/4 x 12"- score at 4, 6 & 8"
  • Black Glitter- 3/4 x 3 3/4"
  • Black Glitter- 4" strip- die cut scalloped rectangle
  • Basic White- 2 x 3 3/8"- stamp moon, witch & words onto for card front
  • Basic White- 1" strip- stamp words onto & punch out with Everyday Label Punch
  • Basic Black- 2' strip- punch out Everyday Label Punch
  • Basic Glitter- 2 1/2" strip- die cut spider web
designer paper:  Cute Halloween
  • 3 3/4 x 5"- for front of card
  • 1 3/4 x 5"- for center
  • 1 3/4 x 5"- for center
ink:  Daffodil Delight & Memento
other:  Stampin' Cut & Emboss Machine; Frightful Tags Dies; Scalloped Contours Dies; Everyday Label Punch; Wink of Stella; Black & White Gingham Ribbon; Matte Dots; dimensionals; glue dots
Happy Halloween from our home to yours.....
I hope you have a SPOOKTACULAR Day!
Happy Stamping!
Hugs-
SUSIE

Saturday, October 30, 2021

Cute Halloween Shaker card

WOO HOO!!
Our countdown to Halloween is coming to and end on this
Happy Halloween Eve Day!

Check out this CUTE shaker card!
It just makes me smile!
My inspiration for this card came from my dear friend Rhonda Morgan.

Faux shaker cards are soooo easy to make!
I have made many of them over the years......
You can click below to see some others that I have made & posted 
previously here on my blog.
 
Here are the supplies & measurements.
stamp set:  'Frightfully Cute'
card stock:
  • Basic Black- 5 1/2 x 8 1/2"- score at 4 1/4"- fold in half for card base
  • Black Glitter Paper- 2 1/4" strip- punch out Label Me Lovely punch
  • Basic White- 1" strip- stamp words onto & punch out using the Everyday Label Punch
  • Basic White- 4 x 5 1/4"- for inside of card
designer paper:  Cute Halloween- 
  • 4 x 5 1/4"- put inside the Clear Envelope & make sure you are down securely along the edge & bottom, fold over the side & use Tear & Tape to secure it so that the DSP fits tightly.  Now add a little bit (approx. 1/8 tsp) of the Subtles Shimmer Sequins & then seal the clear envelope shut.
  • 1/2 x 1 1/2"- flag end with Banners Pick A Punch
  • 1/2 x 1 1/2"- flag end with Banners Pick A Punch
ink:  Memento
other:  Black Glittered Organdy Ribbon- 6" (x2); Label Me Lovely Punch; Everyday Label Punch; Banners Pick A Punch; Black Matte Dots; Clear Envelopes; Subtles Shimmer Sequins; dimensionals; glue dots; Tear & Tape
 
I hope you have a SPOOKTACULAR  Saturday!!
Happy Stamping!
Hugs-
SUSIE

Friday, October 29, 2021

Here comes Santa Claus

Ho! Ho! Ho!
Here comes Santa Claus!
 
Oh my gosh......isn't this just adorable!
This is a totally Susie card & I love the way it turned out!

I used the 'Giving Gifts' dies for the Santa & the reindeer.
(Yes- I had to fussy cut out Santa & his reindeer some from
the rectangle that they are in, but it was easy & just took a few snips!)
 
The cute cluster of houses that he is flying over is from the 
'Classic Cloche' stamp set.
This is a fun z fold card (my favorite go to fold)!
 
So leave me a comment & let me know what you think of this!
 
Here are the measurements & supplies.
stamp set:  'Classic Cloche' & 'Watercolor Shapes' (for the moon)
card stock:
  • Basic Black- 5 1/2 x 8 1/2"- score at 2 1/8" & 4 1/4" (for card base)
  • Real Red- 3 3/4 x 5"
  • Basic Black- 3 1/8 x 4 1/4"
  • Basic White- 4 1/4" strip- die cut scalloped rectangle
  • Basic White-  4 x 5 1/4"- for inside of card
designer paper:  Heartwarming Hugs DSP-  3 1/2 x 4 3/4"
ink:  Memento & So Saffron
Stampin' Bleends:  Dark Real Red
other:  Stampin' Cut & Emboss Machine; Gift Giving Dies; Stitched So Sweetly Dies; Real Red Sheer Ribbon; Subtle Shimmer Sequins; dimensionals; glue dots; Paper Snips (scissors)
 
I hope you have a FABULOUS Friday!!
Happy Stamping!
Hugs-
SUSIE

Thursday, October 28, 2021

A Black & White Fall decor

WOW!
I found some wooden pumpkin decors at Dollar General
& decorated them using some SU! products!
 
Just check out this Black & White Plaid Fall/Pumpkin decor!
I think that it turned out super cute! 
 
Look closely at the leaves & you can see the stitching in them!
This die set is so cool as you can cut out the leaves
& add stitching to the leaves= all at one time!

I used the plaid DSP from the Pattern Party
Hostess DSP pack on page 171 in the Annual Catalog.
 I used the 'Love of Leaves' stamp set & coordinating 
Stitched Leaves Dies are from the Annual Catalog.

And the words are from the 'Festive & Bright' stamp set,
 pg. 64 in the Holiday Mini.

Here are the measurements & the supplies.
stamp sets:  'Love of Leaves' & 'Festive & Bright'
card stock:
  • Basic White- 1" strip- stamp words onto & fussy cut out around using scissors
  • Basic Black- 1/4 x 3 1/2"
  • Basic White- 2 3/4" strip- stamp 3 leaves & die cut out
designer paper:  Pattern Party DSP- 3 1/4 x 4"
ink:  Memento
other:  Stampin' Cut & Emboss Machine; Stitched Leaves Dies; Black & White Gingham Ribbon; dimensionals; glue dots
 
I hope you have an AWESOME Thursday!!
Happy Stamping!
Hugs-
SUSIE

Wednesday, October 27, 2021

Time of Giving Bundle

 This is just sooo pretty!!
I just LOVE blue & snowflakes & this card is just awesome!
I used the 'Time of Giving' Bundle on pg. 61 in the Holiday Mini Catalog.

This is a faux shaker card made with a Clear Envelope (50)-
#102619= $6.00- pg. 136 Annual Catalog.
It is so easy, so fun & so cool!
 
How did I do it?
  1. Add DSP to the inside of the clear envelope....putting it down into a corner.
  2. Fold over clear envelope on the backside & tape it down tight.  I used Tear & Tape to hold this.
  3. Add a little bit of the Subtles Shimmer Sequins.
  4. Seal the top shut.
  5. Add the snowflake die cut card stock piece over the top of the shaker using the Foam Adhesive Strips.
  6. I used the Tear & Tape again to stick the shaker/envelope to the Night of Navy card base.
  7. Then decorated the front with a little strip of Night of Navy DSP & some words over the top of it.
  8. Don't forget to add a little ribbon!

Last week I was blessed to have our Sister-In-Law Sheryl here to stay with us & visit.
We stamped a lot!
And it was so much fun!
She helped me with lots of projects that I working on for my annual team retreat.

This snowflake shaker card is one of the cards we made together.
The layout is a CASE (Copy) from the Holiday Mini Catalog- pg. 61,
but we changed it up some!
 Isn't it just gorgeous!!
I love the way it turned out!

Here are the supplies & the measurements.
stamp set:  'Time of Giving'
card stock:
  • Night of Navy- 5 1/2 x 8 1/2"- score at 4 1/4"- fold in half for card base
  • Basic White- 3 1/2 x 5"- die cut snowflakes in this
  • Night of Navy- 1/4 x 3 1/2"
  • Basic White- 3/4 x 2 3/4"- stamp words onto & diagonally cut ends
  • Basic White- 4 x 5 1/4"- for inside of card
designer paper:  Beauty of the Earth-
ink:  Night of Navy
other:  Stampin' Cut & Emboss Machine; Giving Gifts Dies; 1 1/2" Metallic Mesh (Silver); Foam Adhesive Strips; Subtles Shimmer Sequins; Glue Dots; dimensionals

I hope you have a WONDERFUL Wednesday!!
Happy Stamping!
Hugs-
SUSIE

Tuesday, October 26, 2021

I found this cute glass votive at Dollar Tree
& wrapped some snowflakes around it!

What a fun & simple project this is!
This votive would work great to hold some of your stamping supplies too-
liquid glue, scissors, bone folder, piercing tool, etc....
Don't you think that this is cool!!
I used the snowflake from the Giving Gifts Dies!
Here are the supplies & measurements.
 
How did I do it?
Basic White- 2 1/4 x 9"- die cut the snowflakes 3 different times & then wrap it around the votive.  I attached it using liquid glue & rolled up glue dots.  
Other Stampin' Up! supplies I used- Stampin' Cut & Emboss Machine; Giving Gifts Dies; Basic Rhinetones

NOTE:  This glass votive was a little smaller at the bottom than it was around the top edge.  So I snipped the Basic White Snowflake strip along the bottom edge in 2 spots on the snowflake rectangle seam & it then fit perfectly!!

I hope you have a TERRIFIC Tuesday!!
Happy Stamping!
Hugs-
SUSIE

Monday, October 25, 2021

Eden's Garden Specialty Paper DSP Sneak Peek!

 Here is a sneak peek!
 Look at this gorgeous NEW Ever Eden's Specialty DSP!
This DSP is a limited product that is available while supplies last only
starting on 11/1/21!
 
This DSP coordinates with an upcoming Early Release Bundle
that will be in the January-June Mini Catalog.   
You can CLICK HERE to find out more info about this!

Early Re-lease SALES PERIOD- November 2, 2021-January 3, 2022

  • You can get all of these products together in a suite!
  • Or the Eden’s Garden Stamp Set and Eden Dies can be ordered separately, if desired.
  • The Ever Eden Specialty Designer Series Paper and Eden Dies do not directly coordinate.
  • The following exclusive products are only available while supplies last & coordinate with this Eden's Gardens Bundle & they will not be in the upcoming January-June Mini Catalog.
    • Ever Eden Specialty Designer Series Paper
    • Ever Eden Cotton Paper
    • Garden Gems

Here are the supplies & measurements.
stamp set: 'Peaceful Moments'
card stock:
  • Soft Succulent- 5 1/2 x 8 1/2"- score at 4 1/4"- fold in half for card base
  • Evening Evergreen- 1 x 4 1/4"
  • Gold Foil- 2 1/4" strip- die cut Hippo & Friends Dies
  • Soft Succulent- 2" strip- stamp words onto & die cut Hippo & Friends Dies
  • Basic White- 4 x 5 1/4"- for inside of card
designer paper:  Ever Eden Specialty DSP- 
  • 3 x 4"
  • 1 x 4
ink:  Evening Evergreen
other:  Stampin' Cut & Emboss Machine; Hippo & Friends Dies; Gold 3/8" Shimmer Ribbon; Gilded Gems; dimensionals; glue dots

I hope you have a MARVELOUS Monday!!
Happy Stamping!
Hugs-
SUSIE

Sunday, October 24, 2021

Pretty Pumpkins

 
WOO HOO!!  
This is my 1 week to Halloween Countdown post. 
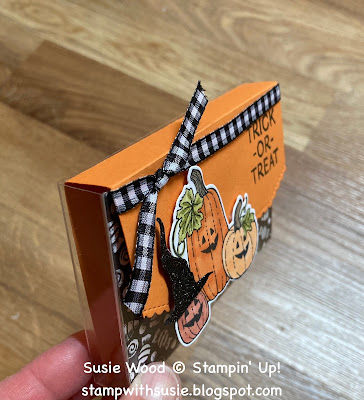
Check out this adorable little Halloween treat box!!

I used the Pretty Pumpkins Bundle & 'Banner Year' stamp sets.
 The witches hat is from the Frightful Tags Dies.
The box is one of the Acetate Card Boxes-
#144628= $7.00, pg. 137 in the Annual Catalog.
I cut an Acetate Card Box in half, so that I could 
get 2 of these treat boxes out of one of them.
This is what it looks like opened up!
Just put your favorite treat inside of it.
I put a rice crispie treat in this one.
 Isn't this just soooo cute!!
I just love it!!
And I hope that you do too! 
Here is the pattern for you on the Pumpkin Pie insert!


Here are the measurements & supplies:
stamp set:  'Pretty Pumpkins' & 'Banner Year'
card stock:
  • Pumpkin Pie- 4 3/8 x 5 1/2"- score at 2 7/8" & 3 1/2".  Then die cut along top edge.
  • Basic White- 2 1/2"- stamp pumpkins & die cut
  • Black Glitter Paper- 1 1/2" strip- die cut Witches Hat
designer paper:  Cute Halloween- 2 7/8 x 4 3/8"
ink:  Memento
Stampin' Blends:  Dark Pumpkin Pie; Light Pumpkin Pie; Light Cajun Craze; Dark Crumb Cake; Light Old Olive
other:  Stampin' Cut & Emboss Machine; Detailed Pumpkin Dies; Frightful Tags Dies; Basic Borders Dies; Black & White Gingham Ribbon; dimensionals; glue dots; Simply Scored Scoring Tool; Acetate Card Box (cut in half so you get 2 boxes)
I also used velcro dots to hold the lid shut.

I am sorry I didn't get a post done for yesterday!!  I have been gone this weekend for a team retreat I hosted & I spent my weekend stamping!!  I didn't have very good internet reception while gone & I didn't have time to get my post done before I left.  

ENJOY!!
I hope you have a SUPER Sunday!!
Happy Stamping!
Hugs-
SUSIE

Friday, October 22, 2021

Beautiful Moments Tile

 I decided to stamp onto this craft tile using 
the 'Beautiful Moments' stamp set!

Oh what fun!
And it was so easy to do!
 Isn't it just sooo pretty!!!!!

How did I do it?

  • I stamped using Memento ink onto the craft tile.
  • I then colored it using my Stampin' Blends.
  • I lightly sealed it using a Rust-Oleum Clear Gloss.

 I have a cork square piece on the back side of this tile.
I WILL NOT use this as a true coaster, as I don't want it to get wet.
I will display it by getting an easel stand for it.

stamp set:  'Beautiful Moments
Stampin' Blends:  Light & Dark Highland Heather, Light Old Olive, Dark Crumb Cake, Ivory
other:  Wink of Stella (added this over the flowers)
 
I hope you have a FABULOUS Friday!!
Happy Stamping!
Hugs-
SUSIE

Thursday, October 21, 2021

Clever Cats

 This is a cute little Post-It-Note cover I made & decorated it
using the 'Clever Cats' stamp set & Cute Halloween DSP!
 
I love the big smile on this pumpkin!
The Post-It-Notes are 3x3".
I used Tear & Tape to attach them to the inside of this cover.
This is the pattern I made-
  1. Pumpkin Pie- 3 1/4 x 7 3/8" 
  2. Score at 3 1/8", 3 1/2" & 3 7/8"
  3. Fold on score lines.
  4. Then make 2 cuts between the score lines to make the pen holder.
  5. Now add Tear & Tape between the score lines on the right side, as shown above.  Be sure you don't add it to the little center piece that will pop out & hold your pen!
 
Here are are the measurements & supplies.
stamp set:  'Clever Cats'
card stock:
  • Pumpkin Pie- 3 1/4 x 7 3/8"
  • Basic Black- 2 1/4 x 2 1/4"
  • Basic White- 2 x 2"- stamp pumpkin/hat onto this
designer paper:  Cute Halloween DSP- 2 7/8 x 3"
ink:  Memento
Stampin' Blends:  Dark Daffodil Delight; Light & Dark Pumpkin Pie
other:  Simply Scored Scoring Tool; Paper Snips; Tear & Tape; dimensionals

Where did I get these little Halloween ink pens?  I found them at Dollar Tree.

I hope you have a great Thursday!!
Happy Stamping!
Hugs-
SUSIE

Wednesday, October 20, 2021

15% OFF Stamps= 24 hour FLASH SALE- TODAY- 10/20/21 only!

WOW- are any of these stamp sets on your wish list?  Check out below the great deal on them & get them during this Flash Sale- TODAY Wednesday, 10/20/21 ONLY!

You can order FROM MY ON LINE STORE @ susiewood.stampinup.net  OR contact ME!

To all that place an order with me today you'll get a FREE 2 card kit if you use this host code.  The host code is shown in the upper right hand corner of my blog!

PLUS your name will be added into a drawing to WIN a FREE Mini Stampin' Cut & Emboss Machine too from ME!   Happy Shopping!  Hugs- SUSIE 


149256 BIRCH $17.00 =$14.45- pg. 118
150528 NATURE'S BEAUTY $21.00=$17.85- pg. 53
151599 PAINTED POPPIES $23.00=$19.55- pg. 24
152556 STACKED STONE $17.00=$14.45-pg. 118
152599 DRYBRUSH $17.00=$14.45- pg. 118
154363 WILD ROSES $17.00=$14.45- pg. 118
155074 STITCHERY $21.00=$17.85- pg. 25
155079 DAISY GARDEN $22.00=$18.70- pg. 106
155634 FESTIVE FOLIAGE $21.00 =$17.85- pg. 90
156927 SPIRAL DYE $17.00=$14.45-pg. 118
149270 A GOOD MAN ENGLISH $24.00=$20.40- pg. 46
149275 VERY VERSAILLES ENGLISH $23.00=$19.55- pg. 101
149320 A WISH FOR EVERYTHING ENGLISH $39.00=$33.15- pg. 14
149325 DAISY LANE ENGLISH $23.00=$19.55-pg. 37
149385 BACK ON YOUR FEET ENGLISH $21.00=$17.85- pg. 85
149457 SAILING HOME ENGLISH $24.00=$20.40- pg. 51
149468 FREE AS A BIRD ENGLISH $22.00=$18.70- pg. 83
151457 FOREVER BLOSSOMS ENGLISH $23.00=$19.55- pg. 73
151490 POSITIVE THOUGHTS ENGLISH $21.00=$17.85- pg. 76
151497 TIMELESS TROPICAL ENGLISH $23.00=$19.55- pg. 21
151595 PEACEFUL MOMENTS ENGLISH $21.00=$17.85- pg. 24
151677 BEAUTIFUL MOMENTS ENGLISH $23.00=$19.55- pg. 79
152500 A GRAND KID ENGLISH $21.00 =17.85- pg. 54
152504 PRIZED PEONY ENGLISH $24.00=$20.40- pg. 73
152517 CELEBRATE SUNFLOWERS ENGLISH $24.00=$20.40- pg. 17

152520 PAMPERED PETS ENGLISH $21.00=$17.85- pg. 54

152525 LOVELY YOU ENGLISH $24.00=$20.40- pg. 37
152539 HAPPIEST OF BIRTHDAYS ENGLISH $19.00=$16.15- pg. 66
152550 WHISKEY BUSINESS ENGLISH $19.00=$16.15- pg. 49
152553 CAMPOLOGY ENGLISH $22.00=$18.70- pg. 53
152559 FOREVER FERN ENGLISH $24.00=$20.40- pg. 71
152562 TASTEFUL TOUCHES ENGLISH $23.00=$19.55- pg. 111
152565 HAND-DRAWN BLOOMS ENGLISH $23.00=$19.55- pg. 108
152568 BEST YEAR ENGLISH $20.00=$17.00- pg. 103
152630 SENIOR YEARS ENGLISH $20.00=$17.00- pg. 86
152641 FROM ALL OF US ENGLISH $21.00=$17.85- pg. 65
152657 WAY TO GOAT ENGLISH $19.00=$16.15- pg. 64
153313 EVERGREEN ELEGANCE ENGLISH $22.00=$18.70- pg. 91
154408 GARDEN WISHES ENGLISH $22.00=$18.70- pg. 22
154411 DRAGONFLY GARDEN ENGLISH $23.00=$19.55- pg. 23
154444 HANDSOMELY SUITED ENGLISH $21.00=$17.85- pg. 50
154452 ENJOY THE MOMENT ENGLISH $23.00=$19.55- pg. 26

154461 STELLAR BIRTHDAY ENGLISH $21.00=$17.85-pg. 57
154464 HEY BIRTHDAY CHICK ENGLISH $21.00=$17.85- pg. 65
154480 SIMPLY SUCCULENTS ENGLISH $22.00=$18.70- pg. 35
154491 WHAT'S COOKIN' ENGLISH $22.00=$18.70- pg. 34
154494 HANDMADE FOR YOU ENGLISH $17.00=$14.45- pg. 119
154510 MANY MESSAGES ENGLISH $22.00=$18.70- pg. 42
154528 BREW SOME FUN ENGLISH $19.00=$16.15- pg. 33
154542 ARTISTICALLY INKED ENGLISH $24.00=$20.40- pg. 97

155001 MANY HAPPENINGS ENGLISH $22.00=$18.70- pg. 42
155009 SEASCAPE ENGLISH $23.00=$19.55- pg. 12
155022 SENDING HUGS ENGLISH $21.00=$17.85- pg. 19
155034 SUNNY SENTIMENTS ENGLISH $20.00=$17.00- pg. 38
155038 AFTER THE STORM ENGLISH $21.00=$17.85- pg. 50
155042 LIGHTHEARTED LINES ENGLISH $21.00=$17.85- pg. 31
155047 MAKE IT HAPPEN ENGLISH $22.00=$18.70- pg. 40
155054 PARTY PUFFINS ENGLISH $20.00=$17.00- pg. 67
155059 CELEBRATE WITH FLOWERS ENGLISH $18.00=$15.30- pg. 17
155082 QUIET MEADOW ENGLISH $21.00=$17.85- pg. 110
155087 ALL SQUARED AWAY ENGLISH $23.00=$19.55- pg. 117
155092 BUTTERFLY BRILLIANCE ENGLISH $17.00=$14.45- pg. 106
155095 ELEGANTLY SAID ENGLISH $23.00=$19.55- pg. 69
155358 FLOWERS OF FRIENDSHIP ENGLISH $21.00=$17.85- pg. 78
155408 ENCIRCLED IN FRIENDSHIP ENGLISH $19.00=$16.15- pg. 70
155444 BUNCHES OF FUN ENGLISH $20.00=$17.00-pg. 41
155454 PATH TO GREATNESS ENGLISH $21.00=$17.85- pg. 48
155468 WILDLY ADORABLE ENGLISH $21.00=$17.85- pg. 55
155474 ONE HAPPY FAMILY ENGLISH $21.00=$17.85- pg.58
155478 BAMBOO BEAUTY ENGLISH $21.00=$17.85-pg. 49
155536 INSPIRED THOUGHTS ENGLISH $19.00=$16.15- pg. 52
155626 FOREVER GRAPEVINE ENGLISH $20.00=$17.00-pg. 76
155647 COUNT ON ME ENGLISH $22.00=$18.70- pg. 82
155665 HENNA HEARTS ENGLISH $18.00=$15.30- pg. 100
155703 PIRATES & MERMAIDS ENGLISH $18.00=$15.30- pg. 58
155772 SWEET FAREWELL ENGLISH $20.00=$17.00- pg. 84
155783 SHADED SUMMER ENGLISH $23.00=$19.55- pg. 75
155790 RIGHT BEHIND YOU ENGLISH $21.00=$17.85- pg. 84
155796 THROUGH IT TOGETHER ENGLISH $22.00=$18.70- pg. 72
156930 BADGER BESTIES ENGLISH $19.00=$16.15- pg. 86


Time of Giving


This is a clean, simple & cute holiday card.
I used the words from the 'Time of Giving' stamp set,
along with the Deer Builder Punch.
 
NOTE:  This Plaid DSP is no longer available
as it from the Peaceful Prints Sale-a-bration DSP pack.
This is how I stamped the inside of it.
Here are the supplies & measurements.
stamp set: 'Time of Giving'    
card stock:
  • Real Red- 4 1/4 x 11"- score at 5 1/2"- fold in half for card base
  • Basic Black- 2 1/4 x 4"
  • Basic Black- 3/4 x 5 1/2"
  • Basic Black- 2 3/4" strip- die cut circle
  • Basic White- 2 3/4" strip- die cut circle
  • Basic White- 4 x 5 1/4"- for inside of card
designer paper:  Peaceful Prints DSP- SAB choice- NOW RETIRED
ink:  Memento
other:  Stampin' Cut & Emboss Machine; Layering Circle Dies; Red Rhinestones; Red Sheer Ribbon; dimensionals; glue dots

I hope you have a WONDERFUL Wednesday!
Happy Stamping!
Hugs-
SUSIE

Tuesday, October 19, 2021

Be Jolly Santa

Ho! Ho! Ho! 
Check out this Holly Jolly Christmas card! 
I used the 'Be Jolly' & 'Holly Jolly Wishes' stamp sets 
on page 29 in the Holiday Catalog.
 
This is one of the cards that everyone made at my 
Holiday Extravaganza class a couple of weekends ago.
This Santa just makes me smile.
I made a pocket on the inside of the card, 
so that you could slide a gift card (or cash) into it!
 
How did I do it?
It is sooo easy......
  1. 4x 5 1/4" piece of Basic White cardstock
  2. Slide the Tailored Tag Punch up from the bottom of the cardstock, as far as it will go.
  3. Center it so that it is even on both the left & right sides.
  4. And NOW punch.
  5. When adding the adhesive- make sure that you only add adhesive to the outside edges.  Do not add adhesive to the center, as you don't want to close up your 'gift card pocket'!
Here are the measurements & supplies.
stamp sets:  
  • 'Be Jolly'- Santa
  • 'Holly Jolly Wishes' (words)
card stock:
  • Cherry Cobbler-5 1/2 x 8 1/2"- score at 4 1/4"- fold in half for card base
  • Basic White- 2 x 5 1/4"- stamp words onto the upper right corner for front of card
  • Basic Black- 3/4 x 5 1/2"- for belt
  • Gold Foil- 1 x 1"- for belt buckle
  • Basic Black- 3/4 x 3/4"- for belt buckle
  • Cherry Cobbler- 3 1/4" strip- die cut scalloped circle
  • Basic White- 3" strip- die cut circle & stamp Santa onto
  • Basic White- 4 x 5 1/4"- for inside of card
designer paper:  Sweet Stockings DSP-  1 1/2 x 5 1/4"
ink:  Cherry Cobbler & Memento
Stampin' Blends:  Dark Cherry Cobbler; Ivory; Dark Daffodil; Light Basic Black
other:  Stampin' Cut & Emboss Machine; Layering Circle Dies; Wink of Stella; Tailored Tag Punch; dimensionals

I hope you have a TERRIFIC Tuesday!!
Happy Stamping!
Hugs-
SUSIE