Pages

Monday, April 8, 2019

'Flowering Desert'- a CUTE Catus!

This is another one of my cards everyone attending my All Occasions Card classes made last month.  I just really like the way it turned out!  

When I first saw this stamp set- I wasn't in love with it.  But the more I have played with it- I love it!  It is so fun & easy to use.  It has endless possibilities for sure in creating so many different projects with it.

You can see another cactus card I made, using this same stamp set by CLICKING HERE!
I combined alot of different products here, that are in the Occasions catalog. 

I stamped all of the images using the Old Olive ink.  But when I stamped 2 of the plant images- I stamped them off one time on my grid paper first- before stamping them onto my Whisper White square- so that they are slightly lighter.  Do you ever do this?  It is a great way to get more use out of just one color of an ink pad & getting a light & dark image!

stamp set:  'Flowering Desert'
card stock:
  • Old Olive- 5 1/2 x 8 1/2"- score at 4 1/4"- fold in half for card base
  • Pear Pizzazz- 5 x 3 3/4"
  • Lovely Lipstick-  3 1/4" strip- cut out using the largest Scalloped Square Framelit; 1/2" strip- punch out little flower & using a glue dot stick it onto the cactus. 
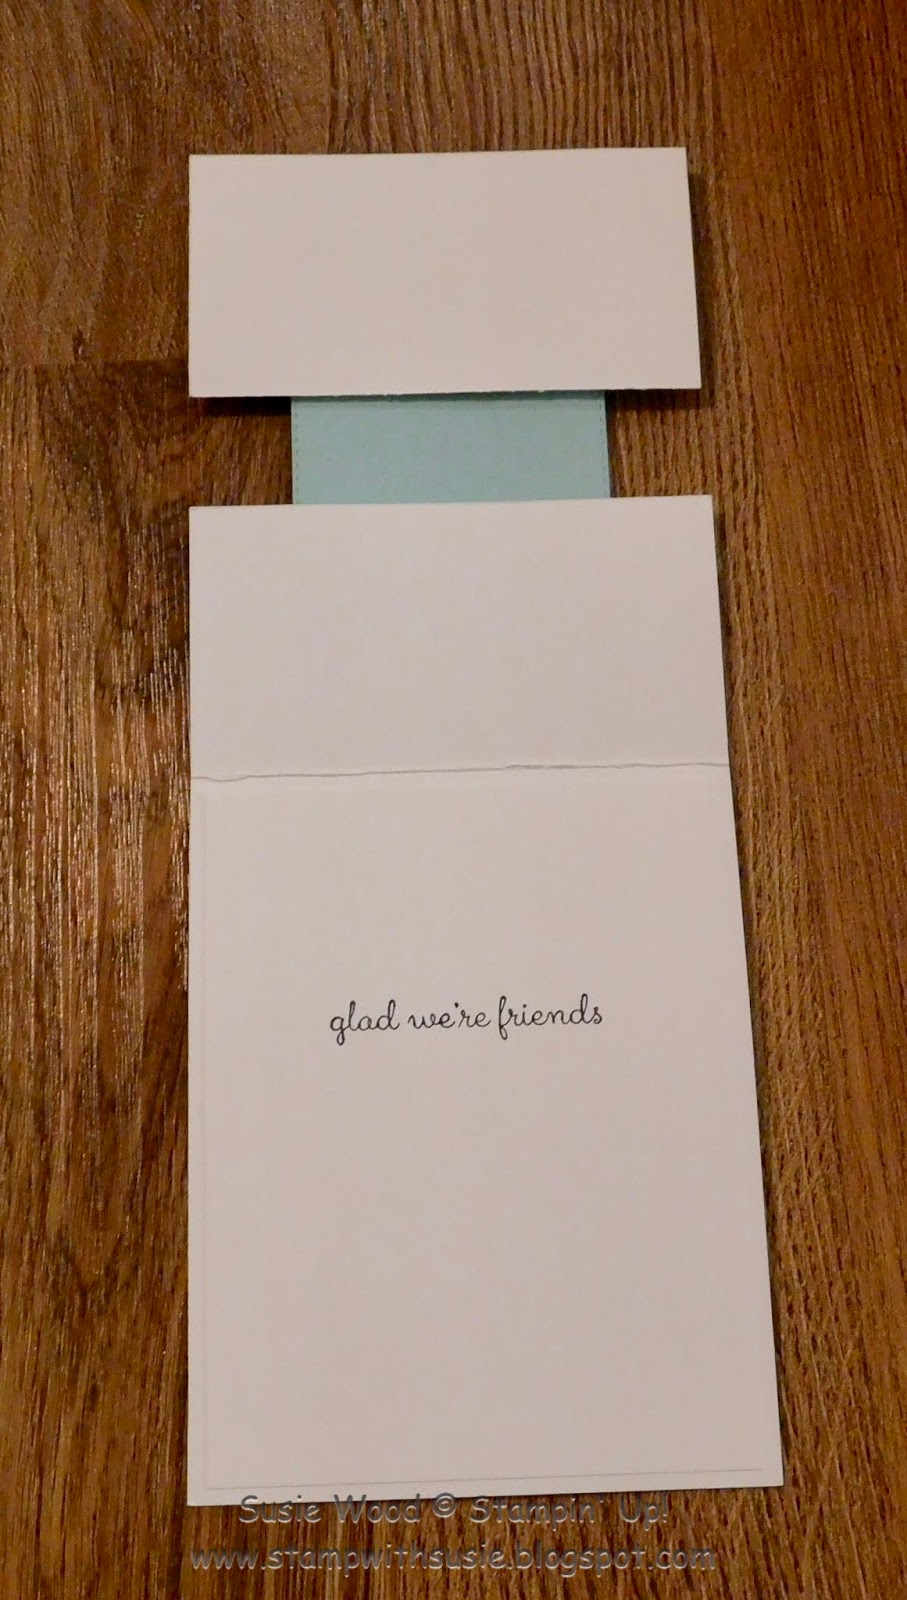
  • Whisper White- 4 x 5 1/4- stamp greeting on for the inside of the card; 2 3/4 x 2 3/4- stamp with cactus/plants on; 1/2" strip- stamp words onto & using your Paper Snips- cut to desired length & attach over the narrow DSP strip. 
designer paper:  All My Love DSP- 3 3/4 x 1"; 3 3/4 x 1/2"
ink:  Old Olive
other:  Big Shot, Magnetic Platform, Layering Square Framelits, Bitty Blooms Punch, Basic Rhinestone, Old Olive Linen Thread- 12" fold in half & tie a bow, Dimensionals, Glue Dots, Paper Snips
 ++++++++
Yesterday was another great day of stamping!  We had a great group & wonderful hostesses.  They brought yummy treats, had a super cute decorated table & were lots of help!  

I was beat when I got home last night.  I did a few things & ended up falling asleep on the couch- while waiting on Deke to come in from the field.  

This morning we are up early.  Deke is off to chore & head to the courthouse for his weekly board meeting.  I'm up to unload my car, put away some stamp stuff & head to town to get the boys.  I'll spend my day with the 3 little ones.  And tonight I"ll be burning the midnight oil stamping!

I hope you have a MARVELOUS Monday!!
Happy Stamping!
Hugs-
SUSIE

Sunday, April 7, 2019

A SUPER CUTE bunny!!


What a SUPER CUTE bunny this little guy is!!!  He looks so sweet & innocent.  He looks like to me that he is praying, the way he is holding his hands.  

He would make a great Easter card, Baptism card, Baby card, Birthday card, etc.....he'd be great for many different occasions.  

I used the Occasions Catalog 'Fable Friends' stamp set- pg. 30 to make this card.  
So do you agree- isn't he just so CUTE!
This is a fun fold card that has a center opening.  This is what it looks like when it is opened up.  I love the way it turned out!

stamp set:  'Fable Friends'
card stock:  
  • Thick Whisper White- 7 3/4"x 4 1/4"; 4 1/4 x 2 1/4"
  • Whisper White-  2" strip- stamp words on & punch out with the 1 1/4" Circle Punch, 1 7/8 x 3 1/4"- stamp bunny on & color with the Stampin' Blends; 4 x 5 1/4"- stamp greeting on inside of the card
  • Pool Party-  4 x 1/2"; 4 x 1/2"; 2" strip- punch out 1 3/8" Scalloped Circle Punch, 1/2" strip- punch out large star with Twinkle Builder Punch
designer paper:  Twinkle Twinkle DSP- 4 x 2"; 4 x 2"
ink:  Black Memento
Stampin' Blends-  Light Pool Party, Light Crumb Cake, Light Petal Pink
other:  1 3/8" Scalloped Circle Punch, 1 1/4" Circle Punch, Pool Party 3/8" Shimmer Ribbon- 3", Big Shot, Magnetic Platform, Stitched Rectangle Framelits, Twinkle Builder Punch, Dimensionals, Glue Dots

+++++++=
Yesterday was a busy day & full of stamping!  I had a great time at my class in N. Liberty with everyone.  Gloria was our hostess this month.  She had yummy treats, cute table decor & was great help!  

I got home last night about 7:30 & I burnt the midnight oil (plus)- cutting everything for today's 2 stamp classes.  I'm headed out this morning to Hiawatha & I look forward to my day stamping with everyone joining me there.  Cathy & Judy are my 2 hostesses for these classes.  I can't wait to see everyone, stamp & share!

I hope you have a SUPER Sunday!!
Happy Stamping!
Hugs-
SUSIE

Saturday, April 6, 2019

'First Steps' baby girl card-

Check out this pretty baby girl card!  I love the hand prints!  I used Melon Mambo for the card base, as that is what matched this DSP!  

I think it turned out cute!  Adding the Melon Mambo Glitter Enamel Dots just finished it off!
stamp set:  'First Steps'
card stock:

  • Melon Mambo- 5 1/2 x 8 1/2- score at 4 1/4- fold in half for card base
  • Pool Party- 4 1 4/ x 2 1/4"; 2 3/4" strip
  • Whisper White- 4 x 5 1/4 (for inside card greeting), 4 x 1; 2 3/4" Strip
designer paper:  How Sweet It Is- 4x2"
ink:  Melon Mambo
other:  Big Shot, Layering Circles Framelits, Magnetic Platform, White Flax ribbon, Starburst Punch, Glitter Enamel Dots, Dimensionals, Glue Dots
These are the 2 baby girl & boy cards that everyone made at my All Occasions Card Classes.
I posted the Coastal Cabana boy one a few weeks ago.  You can CLICK HERE TO SEE IT!
++++++++
Yesterday was a busy day with the kids.  Deke had another meeting yesterday, so he wasn't home to eat lunch with us.  When they went home last night I literally spent my whole night stamping.  
I'm up early this morning to finish getting all of the cards cut for this weekends 3 stamp classes.  I'm off to N. Liberty after bit, as I have my monthly class there with my group today!  I am looking forward to seeing everyone- stamping & sharing!  I can't wait!

Gotta run.......
I hope you have a SENSATIONAL Saturday!
Happy Stamping!
Hugs-
SUSIE

Friday, April 5, 2019

'Buttertfly Gala'

This was the first card I created last month for my 40 card class!  How fun & easy it is to do a reverse image of a punch!  Notice how I put a 2x2" piece of DSP behind the punched out butterflies!  Cool huh!

I had everyone stamp the butterflies on the lower/middle of the Whisper White piece of card stock & then punch it out; turn their card stock over (so that none of the stamped image showed).  They could then add the stamped words, ribbon & DSP.  I had them put the punched out butterflies on the inside of their card!

The white piece here is to resemble a mason jar!  See how I took a little  Circle punch & made just a tiny slit out of the top of each side.  That helped to hold my ribbon in place too!

stamp set:  'Butterfly Gala' & 'Rooted in Nature' (words)
card stock:
  • Calypso Coral-
  • Grapefruit Grove-
  • Whisper White-
designer paper:  Painted Seasons- SAB choice- NOT available now
ink:  Calypso Coralother:  Butterfly Duet Punch, Basic Pearls, small Circle punch, Grapefruit Grove Ribbon, Dimensionals, Glue Dots
++++++++
Busy here with kids & stamping!
I hope you have a FABULOUS Friday!
Happy Stamping!
Hugs-
SUSIE


Thursday, April 4, 2019

'Piece of Cake'

You all know that I'm a punch girl & I love this Cake Builder punch!!!  This is just such a cute bundle!

This is a fun birthday card that was one everyone at my 40 card classes made.
I like this card alot!  The colors are bright & cheery.  It is fun & it is clean & simple!  What a perfect birthday card!

stamp sets:  'Piece of Cake' & 'Amazing Life'
card stock:
  • Coastal Cabana- 5 1/2 x 8 1/2"- score at 4 1/4", fold in half for card base; 1 1/2" strip- stamp cake onto & punch out with the Cake Builder Punch
  • Bermuda Bay- 4 1/4 x 1"; 4 1/4 x 2 3/4
  • Basic Black- 1 1/2" strip- punch out cake stand
  • Whisper White- 4 x 5 1/4- stamp greeting on for inside of the card; 4 x 2 1/2- stamp words on the lower bottom
designer paper:  How Sweet It Is DSP- 4 x 3"

ink:  Black Memento
Stampin' Blends:  Light Bermuda Bay, Light Daffodil Delight (for the candles)
other:  Cake Builder Punch, 1/4" Mini Striped Bermuda Bay- 4", Dimensionals, Glue Dots
This is just another one of the different cake options in this stamp set!  I just had to share it......isn't it cute with chocolate frosting dripping down off of it!  I used the Dark Soft Suede Stampin' Blend & my Wink of Stella to do the frosting!
++++++++
Yesterday was a busy day with the kids.  When they left last night- I made a quick trip to take our hog check to the night depository at the bank.  I then came home & stamped the rest of the night.

This morning I'm up early to stamp.  Deke is off to chore, as he has a meeting at the courthouse this morning.  I'll headed to town to get Trey & then spend my day with the 3 little ones.  Tonight I'll be burning the midnight oil again stamping!
 
I hope you have a great Thursday!!
Happy Stamping!
Hugs-
SUSIE

Wednesday, April 3, 2019

'Beauty Abounds'

Wow- I love how this card turned out!  It is clean, simple & cute!  This was another one I created for my 40 card class.  What do you think?  In person I added the Wink of Stella to the butterfly & the flowers & they look so pretty!
stamp set:  'Beauty Abounds'
card stock:
  • Grapefruit Grove- 5 1/2 x 8 1/2"- score at 4 1/4- fold in half for card base
  • Basic Black- 4 1/4 x 2 1/4"; 1 1/2" strip
  • Whisper White- 3/4" strip- stamp words on & cut to desired length; 1 1/2" strip; 4 x 2"- stamp flowers/leaves onto & color with the Stampin' Blends
designer paper:  Gingham Gala-
ink:  Black Memento
Stampin' Blends:  Dark Old Olive, Light Calypso Coral
other:  1 3/8" Scallop Circle Punch, 1" Circle Punch, Wink of Stella, Calypso Coral Ombre ribbon, Dimensionals, Glue Dots
+++++++++
Yesterday was a busy day with kids & a busy night stamping!

This morning Deke is up early to chore & head to his office at the courthouse.  I'm up & headed to town to Manda's, as she has an early meeting.  I'll take the 2 big boys to school & spend my day with the 3 little ones.  Tonight I'll be stamping!

I hope you have a WONDERFUL Wednesday!!
Happy Stamping!
Hugs-
SUSIE

Tuesday, April 2, 2019

'Golden Afternoon'

This is a clean & simple sympathy card that everyone made at my All Occasions card classes.  It seems that I often here how many sympathy cards we all need......and I totally get that, as I seem to send alot of them too.

In January I posted a sympathy card that is similar to this one, but it was a fun fold & I used different DSP.  You can see that CARD BY CLICKING HERE! 

I like both of these cards......this one is a little darker since I used the Early Espresso!  I honestly am not sure which one I like better.  I am a fun fold girl....but this clean & simple one is cute too with the Wood Textures DSP!

Where did I get this ribbon?  It is the Burlap Ribbon on pg. 200 in the Annual Catalog.  I cut it to approx 3"- cut in half, tied in a knot & then shredded the ends!

stamp set:  'Golden Afternoon'
card stock: 
  • Early Espresso- 5 1/2 x 8 1/2- score at 4 1/4"- fold in half for card base
  • Crumb Cake-3 3/4 x 3/4"- stamp greeting on for the front of the card; 4 1/4 x 3 1/2"
  • Whisper White-4 x 3 1/4"- stamp tree on this piece; 4 x 5 1/4- for inside of card for greeting
designer paper:  Wood Textures 6x6 DSP- 5 1/4 x 2"
ink:  Early Espresso
other:  Dimensionals, Glue Dot, Burlap ribbon- 4"
+++++++
Yesterday was a busy day with kids & stamping!  Last night I made a quick trip to the bank to deposit a hog check & right back home to stamp!

This morning I'm up early to work on things before I head to town.  I'll take the twins to school & spend my day with the 3 little ones.  Tonight I'll burn the midnight oil stamping again!  As I have 3 classes this weekend to get ready for, and I'm still working on putting all of the supplies & things away from all of my All Occasions class projects!

I hope you have a TERRIFIC Tuesday!
Happy Stamping!
Hugs-
SUSIE

Monday, April 1, 2019

'Geared Up'

What a great guy stamp set to make great guy cards with!  This suite is awesome!
This is another one of the cards that everyone made with me the past 2 weekends at my All Occasions Card classes!

stamp set:  'Geared Up'
cardstock:
  • Daffodil Delight-  5 1/2 x 8 1/2"- score at 4 1/4, fold in half for card base; 2" strip to stamp words onto & punch out with the Tailored Tag Punch
  • Basic Gray- 5 1/2 x 1/2"; 2" strip; 2 1/4 x 3 1/2"
  • Whisper White- 4 x 5 1/4"- for greeting inside of card; 3 1/4 x 2"- stamp car onto & color with the Stampin' Blends
designer paper:  Classic Garage DSP- 4x3"
ink:  Black Memento
Stampin' Blends:  Dark & Light Daffodil Delight, Light Smoky Slate
other:  Tailored Tag Punch, Dimensionals
++++++++
Yesterday was a busy day- unloading, unpacking, putting away!  And answering emails, etc.

We went to Ron's visitation last night & saw lots of friends we hadn't seen in years!  It was later than I had hoped when we got home & I had lots to get done.  So I burnt the midnight oil working on stamping stuff.

This morning Deke is up early to chore & head to the courthouse for his weekly board meeting.  I'm up early to work on putting more stamp stuff away before I head to town to get Trey.  I'll spend my day with the 3 little ones.  And tonight I'll be stamping!

I hope you have a MARVELOUS Monday!!
Happy Stamping!
Hugs-
SUSIE

Sunday, March 31, 2019

'By the Bay'= LAST day for Sale-a-bration!

 
'By the Bay' is another Sale-a-bration choice that you can get for FREE with a $50 product order.

Today is last day of Sale-a-bration!!  Have you gotten all of the products that you wanted?  

As far as I understand it- the Teapot framelits & the Country Floral Embossing Folder are the only ones that are carrying over into the annual catalog.  The rest of them are gone forever!

Where did I get that punch?  I used the Tailored Tag Punch!  Check out below how I did it!
stamp set:  'By The Bay' & 'High Tide' (birds)
 card stock:
  • Soft Suede- 5 1/2 x 8 1/2"- score at 4 1/4, fold in half for card base
  • Sahara Sand- 4 x 3"; 5/8" strip- stamp words onto & punch out
  • Whisper White- 3 3/4 x 2 3/4"- stamp images onto this piece; 4 x 5 1/4"- stamp greeting on for the inside of the card
designer paper:  Wood Textured DSP- 4 x 2"
ink:  Soft Suede, Pineapple Punchother:  Tailored Tag Punch, 3/16" Braided Linen Trim (carry over from the Holiday Catalog), Sponge Dauber, Dimensionals, Sponge

How did I do it?
1.  I stamped the words onto a strip of 5/8" card stock.
2.  I centered the card stock/words in the center of the Tailored Tag Punch.  

3.  It is done!  Neat huh!  So quick & easy & a new shape for you to use with a current punch!  I love it!

 ++++++++
Yesterday was a LONG day!!  I haven't had much sleep this whole month & it is catching up with me!  I got a couple of hours of sleep on Friday night before we got up yesterday morning to sell hogs.  I then was gone to South English for my 40 card class from 8:30 am to 8:30 p.m.!  Yesterday was another great day of stamping though!!  I'm so glad that everyone there could join me!  Thanks to all of you whole brought snacks!  And to Karen for staying to help me clean up until Deke got there.  

Today is our 35th Wedding Anniversary!  WOW- can't believe it has been that many years.  How blessed I am to have such a great husband.  He is a true blessing in my life & I look forward to many more years together!
 
Today I will be unloading both vehicles that are clear full of stamping stuff & trying to catch up on emails & my piles of other things.  Tonight we are going to Keota to a family friends (Ron Merz) visitation.  

Gotta run.
I hope you have a SUPER Sunday!
Happy Stamping!
Hugs-
SUSIE

Saturday, March 30, 2019

'Forever Lovely'

The flowers on this DSP are gorgeous!  It is from the All My Love DSP in the Occasions Catalog. 

This is a clean & simple card- but very elegant.
stamp set:  'Forever Lovely'
card stock:
  • Flirty Flamingo-  5 1/2 x 8 1/2- score at 4 1/4- fold in half for card base; 5 x 1 3/4"; 2 1/2" strip to cut out oval
  • Whisper White- 4 x 5 1/4"- for card front; 4 x 5 1/4"- stamp greeting on for inside of card; 2 1/2"- cut out oval using the Stitched Oval Framelit
designer paper:  All My Love DSP- 1 1/2 x 5"
ink:  Flirty Flamingo
other:  Big Shot, Layering Oval Framelits, Stitched Shapes Framelits, Magnetic Platform, Gingham Gala Adhesive Backed Sequins, Powder Pink Mini Ruffled Ribbon- 4"
++++++++
Yesterday was a busy day with the kids.  When they went home, late yesterday afternoon- Deke & I went to set up tables/chairs & some of the things in South English!  We then came home & made the food, packed things up & I finished cutting card stock all night!

Check out my piles-
This is last week's card stock bases that I cut!
And this is this weeks card stock bases that I cut!

I cut lots of card stock!  
It was a short night last night.  We were back up at 5:00 a.m. to mark, sort & load hogs.  Hopefully all goes well & we get done at a decent time.  I'll hurry in, shower, load my car & head to South English.  I'll finish setting up & ready for everyone joining me!  I can't wait to spend my day stamping with all of them!

Gotta run.....
I hope you have a SUPER Saturday!
Happy Stamping!
Hugs-
SUSIE

Friday, March 29, 2019

Painted Seasons

This is another bright & cheery card.  I used the Painted Seasons DSP on it.  The Painted Seasons DSP is a Level 1 SAB choice that you can get for FREE with a $50 order.  OR if you want the coordinating flower images stamp set that goes with it- the 2 are a Bundle & a Level 2 SAB choice that you can get for FREE with a $100 order. 

This DSP has poppies on it in varied colors of orange- Poppy Parade, Calypso Coral & Grapefruit Grove.  It is almost a photographic style DSP.  These flowers have so much depth & dimension in them- they are so pretty!  The Early Espresso flower centers just make them pop!
So what do you think?  I love the way it turned out!  It is quick & simple with a few accents added to dress it up!

And Yes- this is another one of my upcoming All Occasions Class cards.  

stamp set:  'Dandelion Wishes'
card stock:
  • Poppy Parade- 5 1/2 x 8 1/2"- score at 4 1/4", fold in half for card base
  • Calypso Coral- 2 3/4" strip- cut out 2 1/2" Circle with Layering Circle Framelits
  • Early Espresso- 2 3/4" strip- punch out with Starburst punch
  • Call Me Clover- 2" strip- punch out leaves
  • Whisper White-2 3/4" strip- stamp words onto & punch out with the 2 1/4" Circle Punch; 4 1/4 x 1"; 4 x 5 1/4- stamp greeting on for the inside of the card
designer paper:  Painted Seasons- SAB choice- 5 1/2 x 2"
ink:  Poppy Parade
other:  Leaf Punch, Big Shot, Layering Circle Framelits, Starburst Punch, 2" Circle Punch, Whisper White 3/8" Classic Weave ribbon- 4", Dimensionals, Glue Dots, Happiness Blooms Enamel Dots
+++++++
Yesterday was a busy day!!  I got up early yesterday morning & baked bar cookies (before anyone else was up) to take to church for a funeral dinner, as I'm on the committee this time.  I then got Brayden up, fed, loaded all of the kids up & headed to town to Manda's.  I took the 3 big boys to school & then spent my day with the 3 little ones.  Deke was up early to chore & gone all day, as he had 2 meetings, so he wasn't home again.   

The kids played outside for awhile yesterday afternoon again.  It is so nice to get the fresh air.  It was a little windy- but we enjoyed it.  Trey is doing great at learning how to pump himself on the swing.  He was quite proud he 'got it'!  I was proud of him too!

Last night Deke was finally home with us.  We ate supper, did baths, homework, read books, etc.  HOPEFULLY everyone sleeps all night tonight.  I made a big supper with hot pork sandwiches, mashed potatoes/gravy......and I am hoping I calculated the carbs right so Brayden doesn't go high while sleeping.  This meal is one of Deke's favorites & Brayden loves it too!  We have done really good all week with calculating carbs.  Nathan has messaged me several times telling me how good we are doing with them- which is so nice to hear!

This morning Deke will stay home with the 2 little ones- so I don't have to take them all out with me.   I'll get Brayden up, fed & we'll head to town to Manda's.  I'll take the 3 big boys to school & head home to spend my day with the 3 little ones again.  Nathan & Sarah will be home today- so their kids will go home later this afternoon.  

After the kdis leave Deke & I will head to South English to set up tables/chairs & some projects.  We'll then come home & get the food ready.  I'll burn the midnight oil finishing cutting card stock & packing up for tomorrow's big All Occasions Card class.  I have a big group joining me & I am so looking forward to spending my day stamping with all of them!

Gotta run......
I hope you have a FABULOUS Friday!
Happy Stamping!
Hugs-
SUSIE

Thursday, March 28, 2019

More Botanical Butterfly DSP!

Yep- more Botanical Butterfly DSP!  Look at how much of a variety you can get with just package of DSP!  And how could you go wrong with this DSP  since one side of each sheet is colored & the other side is black & white!  How cool!

This card is bright & cheery!  And it makes me think of Spring!  This card is also clean, simple & elegant!  Just look at the colors that are in the butterflies & flowers in this DSP.  They look gorgeous in the photo- but in real life they are amazing!

Check out the NEW Story Label Punch.  You can get it this morning (March 2019) for $18.00 or wait & it will be in the new Annual Catalog that begins in June too!  

stamp set:  'Humming Along'- Occasions Catalog- pg. 36
card stock:
  • Calypso Coral- 5 1/2 x 8 1/2- score at 4 1/4 & fold in half for card base;  2" strip- to punch out Story Label Punch
  • Basic Black- 4 1/4 x 3/4"
  • Whisper White-4 1/4 x 3 1/4;  2" strip- stamp words onto & punch out with Story Label Punch; 4 x 5 1/4- for inside greeting
designer paper:  Botanical Butterfly DSP- SAB choice- FREE with a $50 product order- 4 x 2"; & 4 x 1"
ink:  Calypso Coral
other: Story Label Punch, Calypso Coral Satin ribbon- 4", Happiness Blooms Enamel Dots, Dimensionals, Glue Dots
++++++++
Yesterday was a long day going 100 mph.  Deke had meetings all day & he still wasn't in when the kids finally went to bed at 9:30.  Brayden had soccer practice, supper, homework, baths......I was beat when I finally got them in bed- but I burnt the midnight oil cutting card stock. 

This morning we are up early & headed to town.  I'll take the 3 big boys to school & spend my day with the 3 little ones.  The 3 big ones will ride the bus here after school.  Tonight I'll burn the midnight oil again cutting card stock after I get the 3 kids to bed.  

I hope you have a great Thursday!!
Happy Stamping!
hugs-
SUSIE

Wednesday, March 27, 2019

More Botanical Butterfly DSP!

Do you remember this layout?  I shared it with you last week.  But I used the other side of the DSP.

This is one of my All Occasions cards!  So there are a couple of options!  

I love this DSP!  This is the Botanical Butterflies DSP that is a Level 1 SAB choice & you can get it FREE with a $50 product order.  Isn't this purple just so pretty!
stamp set:  'Dear Doily'
card stock:  
  • Highland Heather- 5 1/2 x 8 1/2"- score at 4 1/4", fold in half for card base; 2" strip
  • Basic Black- 4 1/4 x 3/4" ; 4 1/2 x 2 3/4"; 2" strip
  • Whisper White-4 x 5 1/4"- stamp greeting on for the inside of the card; 1 1/2" strip- stamp words onto & punch out using the 1 1/4" Circle punch
designer paper:  Botanical Butterfly- SAB- 4 x 3"
ink:  Black Stazon
Stampin' Blends:  Light Highland Heather to color butterflies in on the Black & White DSP
other:  Organdy ribbon- SAB- NOW SOLD OUT- 4"; Story Time Label Punch- available until 3/31 as a sneak peek & then carrying over into the annual catalog; 1 1/4" Circle Punch; 1 1/2" Circle Punch, Basic Pearls, dimensionals, glue dots, Champagne Shimmer paint/alcohol spray
This photo shows the black & white side- that I colored the butterflies with my Highland Heather Stampin' Blend.  And the Purple is the other side.  So you can choose whichever you like better.  Look how they are the exact same, but flip them & they look so different!  

I am not sure which one I like better!  I like them both.  But honestly, this purple side for today's card is more me. 
+++++++
My week has been totally nuts.......I'm sorry that my posts are short & sweet.  But with so much to do & having kids 24/7- it has been a tough one.  I have gotten near enough done.  I still have lots & lots of card stock to get cut somehow/sometime.  Ainslee isn't sleeping good at all.   I don't know if she is sick or homesick or just what.  Hope today is a better day.  I just need to get through this week & weekends big class.  And then I will hopefully have time to catch up on updating posts with supplies & measurements.

Gotta run.....
Have a wonderful Wednesday!
Happy Stamping!
Hugs-
SUSIE

Tuesday, March 26, 2019

NEW Storage by Stampin' Up!

CHECK THESE OUT!  
WOW- I am super excited about these!
I can't wait to get them!
Deke actually saw them in person when we were in Utah!
He thought they were really cool!
 https://su-media.s3.amazonaws.com/media/Promotions/NA/2019/Storage%20by%20Stampin%27%20Up/04.01.19_SHAREABLE_STORAGE_BY_STAMPIN_UP_NAUKSP.jpg


Your space. Your way.
Whether you have an entire room or a small corner in your home for stamping, your creative space should be tailored to you. Our new product line, Storage by Stampin’ Up!, provides you with modular storage solutions that let you organize—and customize—your space your way!

Product Details

Product Launch: April 1, 2019
  • All order types qualify (e.g., customer, demonstrator, workshop, and online).
  • No order limits apply.
  • Storage by Stampin’ Up! will be featured in the 2019–2020 annual catalog.

Storage by Stampin’ Up! is designed to store and showcase your Stampin’ Pads, Stampin’ Ink Refills, Stampin’ Blends, Stampin’ Write Markers, Watercolor Pencils, and other accessories. Here are some other features and benefits of Storage by Stampin’ Up!:
  • Keeps products organized, tidy, visible, and trackable at all times.
  • Ensures that your Stampin’ Pads, Stampin’ Write Markers, and Stampin’ Blends are all stored horizontally, as recommended.
  • Designed to be stylish, durable, compact, stackable, and modular.
  • Blends in naturally with most home decor with its white neutral color.
  • Stacks vertically and can be arranged to fit practically any flat workspace.
  • Easily assembled and disassembled for rearrangement and/or cleaning.

Storage by Stampin’ Up! Q&A
Will old-design Stampin’ Pads fit in the Ink Pad & Marker Storage Trays?
No. The Ink Pad & Marker Storage Trays are designed to fit our new-design Stampin’ Pads only.
How high can I stack storage trays?
We stacked up to 50 storage trays without any issues, BUT we would not recommend stacking that high. While our Storage by Stampin’ Up! products are sturdy, the higher you stack them, the less stable they’ll become. Use your discretion when stacking.
Can I mount my Storage by Stampin’ Up! products on the wall?
No. Our modular storage products are designed to sit on a table (or similar flat surface).
How should I use the Open Storage Cube?
The Open Storage Cube can be used to hold any miscellaneous items like ribbon, embellishments, and small punches. For more inspiration on ways to use items from our Storage by Stampin’ Up! product line, check out the configuration chart we created.
Can I mix and match Storage by Stampin’ Up! products?
Yes! Our Storage by Stampin’ Up! products are modular and designed with customization in mind. Take a look at the flyer for more information on the size and dimensions of each item in our new modular storage product line.
Do I need a Storage Lid for each 5-tray stack?
No. The Storage Lid covers the top of Ink Pad & Marker Storage Trays, Stampin’ Blends Storage Trays, and Open Storage Cubes, so you need only one per storage configuration.
Are Storage by Stampin’ Up! products free-standing or stacked?
Both. We designed these modular storage products to be free-standing and stackable, so you can customize your crafting space to work best for you.
Will there be expansions to the Storage by Stampin’ Up! product line in the future?
Like all of our product offerings, we hope Storage by Stampin’ Up! will be successful and expand. However, at this point in time, we can’t guarantee any additional modular storage products in the future.
Are there any Storage by Stampin’ Up! bundles available?
We are not currently offering any bundles for items from our Storage by Stampin’ Up! product line. If you’re looking for some examples on how to mix and match our storage pieces together, please take a look at the configuration chart we put together and provided on the demonstrator website.
How many Stampin’ Ink Refills can I store in the Storage Topper?
You can store up to 20 Stampin’ Ink Refills (or other small items) in the Storage Topper.
Are ink pads difficult to remove from Ink Pad & Marker Storage Trays?
No. When you insert an ink pad into a storage tray, a small portion of the ink pad will stick out. We designed it this way, so your ink pads will be both secure and easy to access.
Can I buy individual Ink Pad & Marker Storage Trays and/or Stampin’ Blends Storage Trays?
No. Both of these items include a set of five white plastic trays. Please use the configuration chart to determine how many storage units you need.
What material do you use to make Storage by Stampin’ Up! products?
Our modular storage products are made with white, acrylonitrile butadiene styrene (ABS) plastic, which is a lightweight and durable material.
How do the silicone feet work?
To protect your surface and prevent slipping, we’ve included peel-and-stick silicone feet with the Ink Pad & Marker Storage Trays, Stampin’ Blends Storage Trays, and Open Storage Cube.

'By The Bay'

This is a fun card using the 'By The Bay' stamp set.  This is a Sale-a-bration choice that you can get for FREE with a $50 product order.

Check out the Gingham Gala DSP along the bottom.  I LOVE IT!  It comes in 6x6" size & has a variety of colors- Balmy Blue, Daffodil Delight, Grapefruit Grove, Highland Heather & Lemon Lime Twist!
  • I stamped the images onto the Whisper White card stock using my Black Memento ink pad.
  • I used my sponge dauber & the Pineapple Punch ink pad to lightly add a sun.  
  • I colored the birds with the Light Crumb Cake Stampin' Blend. 
  • I colored the water with the Light Balmy Blue Stampin' Blend.  
  • I added Wink of Stella over the water!
stamp set:  'By the Bay'- SAB choice= FREE with a $50 order
card stock:
  • Crumb Cake- 5 1/2 x 8 1/2"- score at 4 1/4"- fold in half for card base; 4 x 3"
  • Balmy Blue-  5 1/2 x 1 1/4"; 4 1/4 x 3 1/4"
  • Whisper White- 2 3/4 x 3 3/4"- stamp birds onto this; 4 x 5 1/4"- stamp greeting on for the inside of the card; 1/2" strip- stamp words onto & punch out using the Classic Label Punch
designer paper:  Gingham Gala DSP (Balmy Blue)
ink:  Black Memento; Pineapple Punch
Stampin' Blends:  Light Crumb Cake, Light Balmy Blue
other: Sponge Dauber, Wink of Stella, Linen Thread- 12"- fold in 3rd & tie in knot- trim ends, Classic Label Punch
 ++++++++
My whole day/night was busy with kids.  By the time we got done with supper, baths, etc....and everyone was in bed- I ran up to Nathan's to let their dog out, feed & kennel for the night.

This morning we will be up early & off to town, school & then spend my day with the 3 little ones.  The 3 big boys will ride the bus here after school.  Manda is going to stay with all the kids for awhile, so that Steve & I can help Deke sort hogs outside.  We'll then do supper, baths, homework, etc.....

This week is going to be a crazy one.  Somehow, sometime- I've got LOTS of card stock to get cut for my big All Occasions card class that I have on Saturday! 

Gotta run.
I hope you have a TERRIFIC Tuesday!
Happy Stamping!
Hugs-
SUSIE