Pages

Monday, November 18, 2019

Snowman Season

Have you noticed the Snowman Season Bundle on page 20 in the Holiday Catalog?

This is another one of the cards that everyone made at my Holiday Extravaganza last month.  I love snowflakes & snowman- so I was so excited when I saw this bundle in the Holiday Catalog! 

Look at his felt hat & scarf.  They are from the Let It Snow Embellishment kit on page 19. 

I used the Basic Pattern Decorative Masks & the Foam Brayer to make the dots!

I made a card another card similar to this in September.  You can CLICK HERE TO SEE IT!
stamp set:  'Snowman Season'
card stock:
  • Coastal Cabana- 5 1/2 x 8 1/2"- score at 4 1/4"- for in half for card base
  • Pool Party- 4 x 5 1/4"
  • Whisper White- 1 3/4" strip- cut letters out of this; 2 1/2" strip- stamp snowman on this & punch out with the Snowman Builder Punch, 4 x 5 1/4"- for inside of the card
  • Sparkle Glimmer Paper-  4 x 1 1/2"- fussy cut the snow drift curve with Paper Snips
ink: Memento & Coastal Cabana
Stampin' Write Markers:  Pumpkin Pie, Real Red
other:  Basic Pattern Decorative Masks, Sponge Brayer, Let It Snow Embellishment Kit, Basic Rhinestones, Wink of Stella, Big Shot, Magnetic Platform, Hand- Lettered Prose (alphabet set), Paper Snips, Snowman Builder Punch, dimensionals, glue dots

The inspiration for this card came from a swap I got from my friend Lorri Heiling last September.

+++++++++++
I had a great a weekend at Stampin' Up! On Stage.  Oh my gosh......I love the NEW Mini Catalog that starts on January 3rd & can't wait to share it with all of you!!
Here is a picture that Frenchie took of us on Saturday morning.  We had just got done eating breakfast.  The guys were off on the day & us girls were off to attend a fun filled full day of Stampin' Up! things!

Deke & I got home about 3:00 yesterday afternoon.  He chored & I unpacked & started laundry.  We then went to Brayden's basketball game.  

This morning Deke is up early to chore & head to the courthouse for weekly board meeting.  I'm up to get things done & head to Manda's.  I'll take the 3 Seeley boys to school & spend my day with Masen & Ainslee.  Brayden, Brody, Drake & Trey will ride the bus here.  I'm not sure what we are doing tonight.....

Gotta run.....
I hope you have a MARVELOUS Monday!
Happy Stamping!
Hugs-
SUSIE
Sunday, November 17, 2019

A GORGEOUS red glimmer cardinal!

I have a GORGEOUS Cardinal to share with you today!

Check out this beautiful Toile Tidings Suite in the Holiday Catalog on pages 6-9!  This sweet has endless possibilities!  

This was another one of the many cards that everyone made at my Holiday Extravaganza class last month.

Check out the sparkle on this cardinal.  I used the Red Glimmer paper underneath a stamped Window Sheet to make this awesome look!
stamp set:  'Toile Christmas' & 'Tidings All Around'
card stock:
  • Thick Very Vanilla- 4 1/4 x 11"- score at 4 1/4 & 5 1/2"- fold in half for card base
  • Very Vanilla- 4 x 4"- for inside of card
  • Garden Green- 4 x 4"; 4 1/4" strip to stamp wreath onto & cut out with die
  • Real Red- 3 3/4 x 3 3/4"; 1 1/2" strip- stamp words onto & cut out with die
  • Red Glimmer- 3" strip- cut out with cardinal die & use Paper Snips to cut off the fee;
  • Crushed Curry- 1/2" strip- stamp beak onto & fussy cut out with Paper Snips
  • Window Sheet- 3" strip- stamp cardinal onto using Black Stazon & then cut out using Cardinal die
designer paper:  'Toile Tidings DSP- 3 1/2 x 3 1/2"
ink;  Black Stazon, Garden Greenother:  Big Shot, Magnetic Platform, Christmas Cardinal Dies, All Around Wreath Die, Red Rhinestones, Real Red 1" Ruched Ribbon- approx. 16", Dimensionals, Glue Dots, Paper Snips, Tear & Tape

NOTES:  
  • I adhered the Red Glimmer to the back side of the Cardinal Window Sheet.  I also used a glue dot & adhered it under the beak.  
  • BE SURE YOU USE STAZON ink, as Memento will not dry on Window Sheets- no matter how long you let it sit!
I made this fold to be like it was a book opening!  This is a view of it while standing up.  I used Tear & Tape underneath the ribbon to hold the end of the card secure & stuck together.  
+++++++++

We are flying home from a whirlwind of 1 1/2 day at a Stampin' Up! event!!  We will land around noon today & then head straight home.  

Today is also a special day in our family!!  It is Manda's birthday!  I can't believe that my baby is this old already!  She is a beautiful woman- inside & outside.  She is a great wife & awesome mom!  We are soooo blessed & honored to call her our daughter!  We couldn't be more proud of the wonderful woman she has become!
The Seeley Family-
Steve, Trey, Manda, Brody & Drake

I hope you have a SUPER Sunday!!
Happy Stamping!
Hugs-
SUSIE

Saturday, November 16, 2019

Christmas Crowd Etch-a-sketch!

Today it is simple Saturday!!  And check out this super cute card......

Oh my gosh......I LOVE this Etch-a-Sketch card!  I used the 'Christmas Crowd' stamp set in the Holiday Catalog on page 10 to make it.  

Our boys totally love Etch-a-Sketches & they all have one.  They are so fun to doodle & draw with. When I showed this card to them- it totally met their approval!  

I got a swap, similar to this card, from someone in the monthly group I'm in with Carols Group.  I am so sorry- I don't remember who made this- but if you know, please message me, as I'd like to give her credit.  I just loved it & knew when I saw it, that it would be a perfect card for one of my many Holiday Extravaganza projects.
stamp set:  'Christmas Crowd'
card stock:
  • Real Red- 5 1/2 x 8 1/2"- score at 4 1/4"- fold in half for card base
  • Whisper White- 4 x 3"- stamp Santa & gang on this; 5/8 x 2"- stamp outside greeting words on this & flag ends with Tailored Tag punch; 2" strip- punch out scalloped circles; 1 1/2" strip- punch out 1" circles; 4 x 5 1/4"- for inside card greeting; 4 x 5 1/4"- to cover "window" on the inside of card
  • Window Sheet- 4 x 3"
ink:  Memento
other:  Detailed Trio Punch- to round all 4 corners of the card; 1 1/8" Scalloped Circle Punch; 1' Circle Punch; Big Shot; Magnetic platform; Stitched Rectangle Dies; Tailored Tag punch- to flag ends of words; dimensionals; tear & tape


Back several years ago I did an Etch-a-Sketch card using a different stamp set. You can CLICK HERE to see that card!
 
The stamp set I used here is now retired & it was called- 'From the Herd'!
+++++
I hope you have a FABULOUS Friday!!
Happy Stamping!
Hugs-
SUSIE

Friday, November 15, 2019

Pop up inside present, with #Elfie!

#Elfie
Look at this cute elf!!!  He just makes me smile!!  All of the images in this #Elfie stamp set are adorable!

This is one of the fun fold card that everyone made at my Holiday Extravaganza class last month.  

I used the Winter Knit 3D Embossing Folder & the Let it Snow Specialty DSP on the front of this card too.  

But check out the inside of it. 
On the inside I added a little pop up Christmas package.  The card lays flat when it is shut, but when you open the card up, the bottom of the box goes down & the package is opened.  

You could add some cash or a gift card to the inside of the package if you wanted to!
It is neat doesn't it!

Would you like to know how to add a package like this to your card?  Read on- I have step-by-step photos & instructions so that you can do it too!

What are the measurements for this package?
  • Whisper White- 8 x 2"- score at 2, 4 6"= base piece for package.
  • Whisper White- 2 x 2 1/2"- score at 1/2"= add on piece for the box of the package.
  • DSP- 4 x 3/4"= fold in half before adhering to the Whisper White card stock.  Be sure to link up your center fold with the center fold of the Whisper White card stock box piece.
How do you do it?
  • This is what you want it to look like- when you have it all adhered together.  
  • Add 4 strips of tear & tape as shown.
  • For the package bottom- add a strip of tear & tape to along the top score area, right along the top of side of the scored line.
  • Stick this face down onto the back side for the strip.
  • Add the strip of DSP along the front center edge.  
  • Flip the bottom square up so that it is in between- when it is folded up.  
  •  Now peel off the 4 tear & tape strips, fold in half as shown below.
  • Turn it over & adhere it to the inside of the card (bottom) center.
  •  You now have your package added to the inside of your card!
ENJOY making this!  If you have any questions- don't hesitate to contact me!

stamp set: #Elfie
card stock:
  • Real Red- 5 1/2 x 8 1/2"- score at 4 1/4" & fold in half for card base; 4 1/4 x 2"
  • Whisper White- 4 x 2 1/4- stamp elf on;  4 x 2 1/4"- stamp inside greeting on; 2" strip- for inside tag using oval tag die; 1' strip- stamp words onto & punch out using Classic Label Punch
designer paper:  4 x 2"
ink:  Memento, Call Me Clover
Stampin' Blends:  Dark Call Me Clover, Dark Real Red, Dark Daffodil Delight, Ivory, Light Smoky Slate
other:  Classic Label Punch, Tear & Tape, Wink of Stella, Big Shot, Standard Platform, Winter Knit Embossing Folder, Magnetic Platform, Tiny Keepsakes Die (oval tag), dimensionals. Scoring Tool
+++++++
Yesterday was a busy day with the kids.  Then Ainslee stayed with me last night while Sarah was gone & Nathan, Brayden & Maswen went to 6th grade boys basketball practice.  Deke worked late on the farm & I burnt the midnight oil stamping.

This morning we are up early & on the go.  Deke is off to chore & I'm finishing up my swaps & packing.  We are headed out the airport soon, as we are going to our fall Stampin' Up! On Stage event.  It will be a fast trip out & back.....as we won't be there long, but I'm thrilled we are going!  My adopted downline, Lynda is meeting us at the airport & flying out & back with us.  And my downline, Becky P & her husband will meet us at the event.  Tonight the 3 of us have a swap with some demonstrators that my friend, Rhonda is hosting.  I'll then go to a leaders Centre Stage supper & event.  Deke will hang out with some of my friends husbands.  And then tomorrow it will be an all day demonstrator On Stage Event!  WOO HOO!!  I can't wait to see everyone!  AND I can't wait to see the upcoming Occasions & Sale-a-bration Catalogs.  We'll see lots of demonstrations!!  I hope I learn lots of new things to bring home & share with all of you at my upcoming classes.  

Are you planning to come to one of my many Annual Calendar classes in December?  If so you'll get to use lots of new products then- making your new 2020 4x4 chipboard calendars!  And you'll then get to see sneak peeks of NEW products that will start on January 3rd, 2020!

I will have quick posts each morning, with a project to share with you while I'm away.  So be sure you check back by tomorrow!  

I hope you have a FABULOUS Friday!!
Happy Stamping!
Hugs-
SUSIE


Thursday, November 14, 2019

Light & Peace Christmas card

Do you make your own Christmas cards?  Check out this clean & simple Christmas card.  I think it turned out awesome!!  I have all of the supplies & measurements listed below & you can order the supplies & make this!

This was one of the cards that everyone made at my Christmas Stamp-a-Stack classes this month.
This dsp has beautiful copper foil stars on it!   And check out the Copper Star Designer Embellishment!  It worked perfectly to go over the start stamped image.  

stamp set:  'Light & Peace'
card stock:
  • Night of Navy- 4 1/4 x 11"- score at 5 1/2"- fold in half for card base
  • Crumb Cake- 2" strip- stamp words onto & punch out; 3 3/4 x 3 3/4"
  • Whisper White- 4 x 5 1/4"- for inside of card; 3 1/2 x 3 1/2"- stamp shepherd/sheep image onto this, using Night of Navy ink
designer paper:  Brightly Gleaming DSP- 4 x 2"
ink:  Night of Navy
other:  Everyday Label Punch, Star Designer Elements, Denim Ribbon- 4", dimensionals, glue dot
+++++++
Yesterday was a busy day with the kids.  Last night Susie's Hair Hut was open & I cut the 3 Seeley boys hair in the shop.  I then worked on stamping stuff.

This morning I'm up early & headed to Manda's.  I'll take the twins to school & spend my day with Trey & Ainslee.  Brayden, Brody, Drake & Masen will ride the bus here after school.  Tonight Ainslee will be here with me for awhile & I will be stamping, packing & getting stuff ready for us to leave for SU! On Stage tomorrow.....I have LOTS to get done.  

Gotta run....
I hope you have a great Thursday!!
Happy Stamping!
Hugs-
SUSIE

Wednesday, November 13, 2019

Turkey!!

Thanksgiving day is only a couple of weeks away!!  Check out this cute turkey!!  I really like this card!

This one of the cards that everyone made at my Holiday Extravaganza.  

I used the adorable set called- 'Birds of a Feather'.  It is in the Holiday Catalog on page 50.  There are 4 different kind of birds in this set- turkey, canary, chicken & duck.
stamp set:  'Birds of a Feather'
card stock:
  • Crumb Cake- 5 1/2 x 8 1/2"- score at 4 1/4", for in half for card base; 3 3/4 x 1"; 2 3/4" strip- stamp turkey onto & die cut out with Layering Circle Dies
  • Early Espresso- 5 x 3 3/4"
  • Pumpkin Pie- 2 3/4" strip- punch out with 2" Circle Punch
  • Whisper White- 4 x 5 1/4"- for inside of card; 4 1 4/x 2 1/4"; 1 3/4" strip- stamp words onto & punch out with 1 1/2" Circle Punch
designer paper:  Magnolia Lane DSP- 4 x 2"
ink:  Memento
Stampin' Blends: Light colors of-Pumpkin Pie, Mango Melody, Basic Black, Crumb Cake, Petal Pink
other:  White Chalk Marker, White Twine- 12"- fold in half & tie in bow, 1 1/2" Circle Punch, 2" Circle Punch, Big Shot, Magnetic Platform, Layering Circle Dies, dimensionals, glue dots
++++++++
Yesterday was a busy day!!  I took the twins to school.  Then Uncle Jerry, Aunt Kathy, Nathan, me & the kids attended the Veteran's program at the elementary.  Trey & Ainslee spent the day with me, so after the program we ran errands in town- grocery store, Dollar General & the courthouse for me to get my flu shot.  Last night was Pizza for Pops- so Nathan, Deke, Steve & Sarah's dad (Doug) took all the kids & went.  Sarah, Manda & I met them afterwards at Sweet B's for ice cream!  I then came home & worked on stampin' stuff.  We were going to do the Seeley boys' haircuts- so those got postponed for tonight's agenda.  

Deke is up early this morning to chore.  He'll spend the morning at his office in the courthouse & then go to Mt. Pleasant for a meeting.  I'm off to Manda's.  I'll take the 3 Seeley boys to school & then spend my day with Masen & Ainslee.  Tonight Susie's Hair Hut is open to get the Seeley boys hair cuts done.  I'll then work on stamping stuff when I get done.

I hope you have a WONDERFUL Wednesday!!
Happy Stamping!
Hugs-
SUSIE

Tuesday, November 12, 2019

A Merry Moose Chirstmas Ornament

The 'Merry Moose' stamp set in the catalog has endless possibilities!!  Look at this cute ornament that everyone made with me at my Holiday Extravagnaza class last month!
I had originally hoped to stamp the moose onto this, but the wood chips weren't quite big enough.  So I just stamped a cluster of trees on the front!  And then on the back I stamped a greeting & wrote the year on it with my Stampin' Write Marker.  
And here is what I decided to stamp on the back side of it!!  

So what do you think?  I think that they turned out super cute!

I have to give a big shout out to my friend Donna Williams, as her husband John cut these wood chips for me & he even drilled the holes in them!  They were from some trees that were in the timber.  Cool huh!  I think that they are from a White Birch tree- but I am not positive.  I told him on New Years Eve that I'd love to have some.  He brought them to me the first part of February & wouldn't let me pay him for them.  So I sent him home a bunch of bacon for them to eat!

stamp set:  'Itty Bitty Christmas' (words) & 'Merry Moose' (trees)
ink:  Mossy Meadow
Stampin' Write Marker:  Mossy Meadow
other:  Wood tree circle & twine

+++++++
Yesterday I spent my day with Masen & Ainslee!  When they went home last night I worked on stamping stuff.

This morning Deke is up early & off to chore.  He then has his weekly board meeting at the courthouse.  I'm up & will get ready & head to town to Manda's.  I'll take the twins to school.  Trey, me, Ainslee & Nathan will go to the elementary school for the Veteran's ceremony.  Aunt Kathy, Uncle Jerry, Brayden, Brody, Drake & Masen will all be there too.

I'll then spend my day with Trey & Ainslee.  Tonight Susie's Hair Hut is open for business, as the Seeley boys need haircuts!

I hope you have a TERRIFIC Tuesday!
Happy Stamping!
Hugs-
SUSIE

Monday, November 11, 2019

Christmastime is Here DSP!

Look at the gorgeous DSP!  I fussy cut it out with my Paper snips!  WOW......the colors, gold accents & detail that is in this is just amazing!
 

Stampin' Up! has a special suite this month (for November 2019) only!  You can purchase items in this suite all together or you can purchase any of them individually. 

CHRISTMASTIME IS HERE SUITE- 
available November 1, 2019- 
WHILE SUPPLIES LAST!
10.01.19_TH_SHAREABLE_Q4_OOP_NA
Included with the Christmas Is Here product suite-

#152156
GOLD 1/4" (6.4 MM) SHIMMER RIBBON
$7.00
#152155
GOLD GLITTER ENAMEL DOTS
$8.00
#152154
CHRISTMASTIME IS HERE SPECIALTY DESIGNER SERIES PAPER
$14.50
#152159
CHARMING ROSE BRACELET
$22.00
#152144
ROSES DIES
$30.00
#152431
CHRISTMAS ROSE STAMP SET
$38.00
#153944
CHRISTMAS ROSE BUNDLE
$61.00
#153947
CHRISTMASTIME IS HERE SUITE BUNDLE
$112.50

For the words- I stamped them & used the Classic Label punch- to only get part of the words that were actually all on the stamp!!  I thought that worked out great!!!  I always like it when I can use a punch. 

stamp set:  'Christmas Rose'
card stock:
  • Cherry Cobbler- 4 1/4 x 11"- score at 5 1/2"& fold in half for card base
  • Whisper White- 4 x 5 1/4"-for outside of card; 4 x 5 1/4"-for inside of card; 1" strip- stamp words onto & punch out with Classic Label punch
  • Gold Foil- 4 x 1"
designer paper:  Christmastime is Here DSP- rose image- fussy cut out with your Paper Snips
ink:  Cherry Cobbler
other:  Gold Glitter Enamel Dots, Dimensionals, Classic Label Punch, Paper Snips

Other than words in this stamp set, the rest of it could be used for all occasions!  I think that it would be a beautiful birthday, wedding, anniversary or sympathy card!  So the possibilities with this are endless & certainly not limited.
++++++++
Oh my- I had a jam packed weekend full of LOTS of stamping!!  It was all just wonderful!!!  I had a great time sharing, visiting & stamping with the many of you that joined me for my Christmas Stamp-a-Stack classes this past week/weekend!  It was great to see you all!  My heart is full that I get to share my love of stamping with you!!

Bless Ruth for being my right hand person & for all she does to help me set up & for our classes in Hiawatha!  I know I could never do it with out her!  And Monica & Cindy were both AWESOME hostesses!  They brought great treats & were so much help to me in getting things done.  They helped to make both classes yesterday go so smoothly!!!   It was just a great day!!

Last night I got the car unloaded when I got home, we ate supper, I placed orders & finally called it a night!  

This morning we woke up to snow!  UGHH!!!!!  I am not ready for winter!  This is the 3rd time we've had snow on the ground already this fall!  

School is delayed 2 hours.  We were suppose to be going to the Veterans Day ceremony at school, but it got rescheduled until tomorrow.  So I'll be spending my day with the Masen & Ainslee!  And then tonight I'll be working on stamping stuff!!!

Thinking of & being so thankful for the veterans today as we celebrate Veterans Day!  

Gotta run.....I hope you have a MARVELOUS Monday!!
Happy Stamping!
Hugs-
SUSIE

Sunday, November 10, 2019

Ride with Me

How cute is this farm house style old truck!!  

This card is one that everyone made at my Holiday Extravaganza a couple of weeks ago.  It turned out cute!

I stamped the words, punch them out with the Tailored Tag punch & then punch out 2 more pieces, using the Tailored Tag punch & Real Red card stock.  I cut those to pieces......one horizontally & one vertical.  I then layered them behind the words & trim off the 2 end pieces- so that they have even layering all the way around.
I have made several other cards & posted them here on my blog, using this stamp set.  All of them were blue trucks though!  I like how this red one turned out.

stamp set:  'Ride with Me'
card stock:
  • Garden Green-5 1/2 x 8 1/2"- score at 4 1/4"- fold in half for card base; 2" strip (stamp tree on & cut out with die)
  • Real Red- 5 1/2 x 2 1/4"; 2" strip- punch out 2 Tailored Tag Punch; 2 3/4 x 4"
  • Very Vanilla- 4 x 5 1/4"- for inside of card; 2" strip- stamp words onto & punch out with the Tailored Tag Punch
  • Thick Very Vanilla- 2 1/2 x 3 3/4"- stamp truck & color with Stampin' Blends
designer paper:  Toile Tidings DSP-
ink:  Memento
Stampin' Blends:  Dark Real Red, Light Basic Black, Light Gray Granite
other:  Tailored Tag punch, Clear Epoxy Droplets, Garden Green Double Stitched Ribbon, Big Shot, Magnetic Platform, Truck Ride Dies, dimensionals, glue dots
+++++
Yesterday was a great day of stamping!!  I worked on stamping stuff all night!

This morning I'm up early to finish packing up, load my car & head out!!   I have 2 stamp classes in Hiawatha today!!  I have my last Christmas Stamp-a-Stack classes today!  Monica is my hostess for our morning class & Cindy is our hostess for our afternoon class.  I can't wait to see everyone, stamp & share!!!  

Gotta run......
I hope you have a SUPER Sunday!!
Happy Stamping!
Hugs-
SUSIE

Saturday, November 9, 2019

Playful Penguins

The images in this stamp set are so realistic!  Looks at this penguin.  Isn't it cute!

This is one of the cards that everyone made at my Holiday Extravaganza last month!

I love black & white cards, but I added a splash of Bermuda Bay to this one!
stamp set:  'Playful Penguins'
card stock:
  • Basic Black- 5 1/2 x 8 1/2"- score at 4 1/4 & fold for card base; 5 1/2 x 1 1/4"; 3 1/2" strip- for oval
  • Whisper White- 3 3/4 x 5"- for inside of card; 3 3/4 x 5"- embossing with Swirls & Curls Embossing Folder, 3 1/4" strip- for oval; 1 1/2" strip- stamp penguin on this
  • Bermuda Bay-1 1/2" strip- stamp outside greeting on this & cut with oval die;  5 x 1"
ink:  Black Memento, Bermuda Bay
other:  Big Shot, Magnetic Platform, Layering Oval Dies, Standard Platform, Swirls & Curls Embossing Folder, Paper Snips, Frost Epoxy Droplets, dimensionals, Wink of Stella
++++++
Yesterday I spent my day with Masen & Ainslee.  And then I kicked off a full weekend of stamp classes!!

I had a Christmas Stamp-a-Stack class here last night!  It was a fun evening visiting & stamping with everyone that joined me.  This morning I was up early to work on cutting card stock.  We then sold a semi of hogs, so I went out to help Deke mark, sort & load them.  The semi was later than normal, so bless my downline Cindy & Steph for helping me out.  As I have classes today- one this morning & one this afternoon here at our home.  I'm so thankful that Cindy & Stpeh came early & were here to help take care of things here at our home until I got in from working on the farm.  I enjoyed getting to see everyone & visit with all that joined me to stamp today!!!!!  I am off to get everything cleaned up & then finish cutting card stock tonight.  As tomorrow I have 2 of my Christmas Stamp-a-Stacks in Hiawatha.   WOO HOO!!

Gotta run......
Happy Stamping!
hugs-
SUSIE

Friday, November 8, 2019

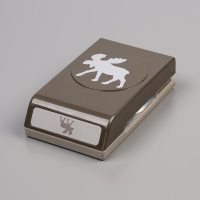
Moose Punch= SOLD OUT!

Moose Punch Has Sold Out and Is No Longer Available

Stampin’ Up! posted this update late last night:
Our inventory of Moose Punch- #item 150652, 
has been depleted and is no longer available for purchase.
That means that the Merry Moose Bundle is also sold out and no longer available.  

But the good news is that the cute Merry Moose stamp set is still available! 
 So you can still purchase this stamp set & use the moose stamp image from it!  

I am SOOO SORRY to have to tell you this!!!  
You all know that I"m a punch girl!  
Plus this is one of punches that I'm using in my 
Christmas Stamp-a-Stack at all of my classes this week!

Mercury Glass Designer Acetate!

This is a pretty & simple card that everyone at made at my Holiday Extravaganza last month!  

I'm so sorry to share this but- I used the Silver Metallic ink pad- which is now SOLD OUT!  But you could use the Blueberry Bushel ink pad here instead!
Don't you just love this Mercury Glass Designer Acetate!!!  I think it looks so cool on here!  I love it!  It is so easy to use too.  It cuts easy & it adheres good to your cardstock. 

stamp set:  'Greatest Part of Christmas' (words- hostess set) & 'Frosted Foliage' (snowflakes)
card stock:
  • Blueberry Bushel- 5 1/2 x 8 1/2"- score at 4 1/4"- fold in half for card base; 3 3/4 x 1 3/4"
  • Whisper White- 4 x 5 1/4" (for inside of card); 3 1/2 x 1 1/2"(for outside greeting)
  • Silver Foil- 5 1/2 x 1/4"; 4 x 2"
designer paper:  Mercury Glass Designer Acetate- 5 1/2 x 2"
ink:  Silver Metallic pad- SOLD OUT NOW- so sorry!
other:  Silver Edge Metallic ribbon, dimensionals, glue dots
+++++++
Yesterday was a busy day with the kids.  Last night I burnt the midnight oil working on getting ready for this weekends stamp classes.  

Today I'll spend my day with Masen & Ainslee.  Tonight I will have my first Christmas Stamp-a-Stack class here at our home!  I am looking forward to seeing everyone that is joining me & I can't wait to stamp with them & share!

Gotta run.....
I hope you have a FABULOUS Friday!!
Happy Stamping!
Hugs-
SUSIE

Thursday, November 7, 2019

The November Paper Pumpkin kit= Christmas TAGS!

11.01.19_DemoHeader_PP_WINTERWONDERSP2
 This is a sneak peek at the November Paper Pumpkin Kit!!

Kit details: It is called- Winter Wonders
  • Makes 24 holiday-themed gift tags of 4 various sizes and designs
  • Coordinating colors: Early Espresso, Pool Party, Poppy Parade, and Shaded Spruce

The October and November kits coordinate; however, each kit is all-inclusive and can stand alone.

To sign up to get this kit you need to contact me or sign up CLICK HERE TO GO TO MY PAPER PUMPKIN STORE!

The holiday season will be here before we know it. And along with putting up the Christmas tree and spending snowy nights by the fire, many of our Paper Pumpkin subscribers will be looking forward to opening their holiday kit. Christmastime papercrafting with Paper Pumpkin has become an annual tradition!

So to deliver more of what our subscribers love this holiday season, in November we are offering this Christmas tags kit.  It will make it easy for you to add a handmade, personal touch to your holiday giving—without a lot of fuss. It’s Christmas made easy with Paper Pumpkin!

Some UPDATES from SU!

Delicata® Ink Pads and Refills 
Available While Supplies Last ONLY-
We have received shipments of Delicata ink pads and refills and they will be available to purchase before the end for the 2019 holiday catalog sales period (January 2, 2020).
UPDATED INFO on 11/7/19 at 5:30 p.m.
  • Celestial Copper Ink Pad (item 150707)* SOLD OUT- not orderable
  • Celestial Copper Ink Refill (item 150708)* SOLD OUT- not orderable
  • Golden Glitz Ink Pad (item 150711)- low inventory
  • Golden Glitz Ink Refill (item 150712) *SOLD OUT- not orderable
  • Silvery Shimmer Ink Pad (item 150709)
  • Silvery Shimmer Ink Refill (item 150710)* SOLD OUT- not orderable
*North America only: Our Celestial Copper Ink Refill inventory has already been depleted and has been turned off.

Due to amount of time it takes to receive shipments of these items, they will not be carrying over into the 2020 occasions catalog. Additionally, when inventory for each item is depleted, that item will be turned off.
++++++++++++
Purple Posy Ink To Be Discontinued-
Despite our efforts to resolve issues with Purple Posy ink, we have learned that the ink color is still shifting over time. This means that the color is coordinating more loosely than we typically allow with our colors. Due to these ongoing challenges, we have decided to discontinue Purple Posy classic ink. As of November 5, 2019,  we shut off the following items & they will no longer be available to purchase:
  • Purple Posy Classic Stampin’ Pad (item 150084)
  • Purple Posy Classic Stampin’ Ink Refill (item 150091)
  • 2019–2021 In Color Classic Stampin’ Pad Assortment (item 150087)
 The three item numbers listed above may still appear in the 2020–2021 annual catalog, but will not be available to purchase as of November 5, 2019. All other Purple Posy products (such as Purple Posy Stampin’ Write Marker, Purple Posy Cardstock, Purple Posy Stampin’ Blends, etc.) will remain available for purchase.

All of Stampin’ Up!’s exclusive ink colors are run through a vigorous series of tests to get ahead of challenges like this, and to ensure colors are accurate and meet our standards of coordination. Purple Posy did pass regular testing standards in time-simulating ovens, but we have now identified that it fell short when it came to actual time passing. The color begins to shift once the ink has rested in the ink pad for about six weeks.

It is rare for Stampin’ Up! or our ink manufacturer to have such persistent issues with ink; Purple Posy has certainly been an abnormal one.  We completed full testing on 11 distinct batches of Purple Posy Classic Stampin’ Ink before releasing the last version. We are now confident that no additional efforts would uphold our coordination needs over time. We appreciate your patience as we have worked through this manufacturing difficulty and regret that we are unable to share better news.
We understand how difficult this is when it comes to demonstrators running their business and for customers wanting to purchase & use a product. We are dedicated to serving everyone to the best we can, even in situations like this. We continue to be committed to offering color coordination across all our product lines.

A Double Point Fold- fall card!

I sooo love this card!!  It is just gorgeous!  The colors, the stamp set, the layout....this is just a great fall card.  

Isn't the layout just so neat!  It is called a Double Point Fold.  You can  CLICK HERE TO SEE how to do this Double Point Fold tehcnique!  I have a step-by-step photo tutorial on how you can make it too!

This card is one of my Holiday Extravaganza projects.  
This is what it looks like when it is opened up! 
I am not sure if you can see the sparkle in these photos or not.  But I added some champagne shimmer spray to it!  

stamp set:  'Gather Together'
card stock:
  • Pretty Peacock-4 1/4 x 5 1/2"; 3 1/2 x 3 1/2"
  • Mint Macaron-4 x 5 1/4"; 2 3/4" strip; 2" strip
  • Crumb Cake- 2 1/2 x 2 1/2"
  • Whisper White- 3 x 3" (for inside of card)
designer paper:  Come to Gather dsp- 4x3"; 4x3"; 3x3"ink:  Pretty Peacockother:  Big Shot, Magnetic Platform, dimensionals, 1 1/2" Circle punch, Noble Peacock Rhinestones, Pretty Peacock Scalloped Linen Ribbon, glue dot, Champagne Mist Shimmer Paint Spray, Stampin' Spritzer
+++++++++
Yesterday Masen, Ainslee & I ran errands in the morning.   We went to the bank & the cemetery.  We took a fall wreath & leaves to the cemetery to put on my dad's grave.  The weather was beautiful & we were outside for a bit enjoying it.  Brayden & Trey rode the bus here after school. (Brody & Drake had Clover kids 4-H.). When they were gone home I made a quick trip to Osky to deposit a hog check, got a few groceries & back home.  I took supper out to Deke in the field & then spent my evening working on stamping stuff.

This morning I'm up early to cut card stock & then head out to get the boys.  I'll take the twins to school & spend my day with Trey & Ainslee.  The boys will all ride the bus here after school.  Tonight I'll be burning the midnight oil agasin cutting card stock!!  

I hope you have a great Thursday!
Happy Stamping!
Hugs-
SUSIE