Pages

Showing posts sorted by relevance for query Circle Stamping. Sort by date Show all posts

Monday, April 24, 2023

Circle Sayings Cupcake- Sneak Peek!

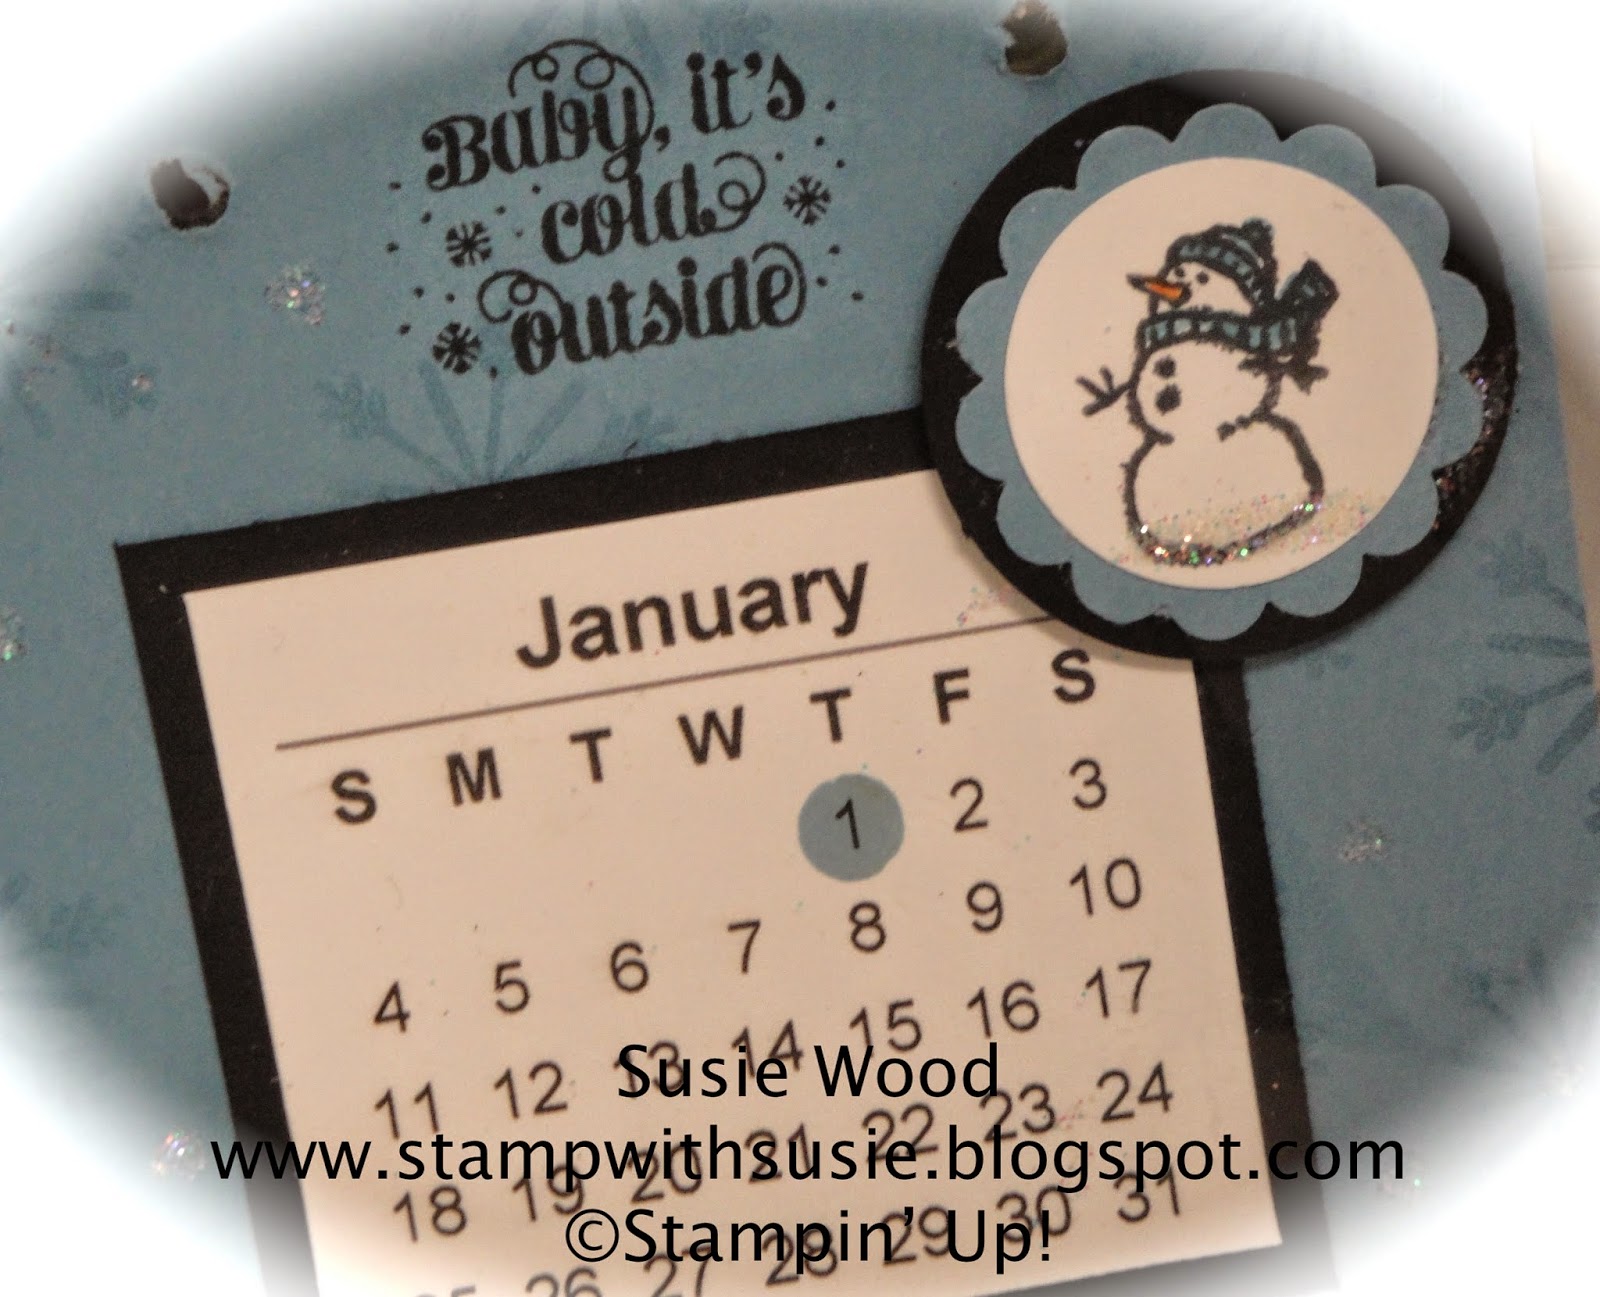
Check out this NEW sneak peek!!
I used the NEW 'Circle Sayings' bundle!
This is an awesome stamp set, along with a 2 3/8" Circle Punch.
You all know that I'm a punch girl, so I'm super excited we have another 
NEW Circle Punch!

This is one of the cards that everyone stamping with me 
at my upcoming Spring Card Classes will be making!
 
The DSP is from the Flowers & More Host DSP 
that is in the Spring Mini Catalog & RETIRING!

I added Wink of Stella to the frosting to make it sparkle!
And I like white cupcakes....so I didn't color the cake part.
Here are the supplies & measurements.
stamp set:  'Circle Sayings'- NEW available 5/2/23
card stock:
  • Parakeet Party- 5 1/2 x 8 1/2"- score at 4 1/4" & fold in half for card base
  • Parakeet Party- 3 1/4 x 3 1/4"
  • Parakeet Party- 1/2 x 3 1/4"
  • Parakeet Party- 2 3/4" strip- stamp Celebrate & punch out with 2 3/8" circle
  • Starry Sky- 3 1/2 x 4 3/4"
  • Basic White- 2" strip- stamp cupcake & die cut with 1 1/2" circle die
  • Basic White- 4 x 5 1/4"- for inside of card
designer paper:  Flowers & More Host DSP- RETIRING!
  • 3x3"
ink:  Memento
Stampin' Blends:  Light & Dark Starry Sky
other:  Stampin' Cut & Emboss Machine; Layering Circle Dies- RETIRING!; Wink of Stella; Ombre Decorate Dots; dimensionals
 
I hope you have a MARVELOUS Monday!
Happy Stamping!
Hugs-
SUSIE

Saturday, December 13, 2014

My January 2015 Calendar page

Here is my January 2015 Calendar page!  Isn't this little snowman super cute!!  I tried really hard to make myself do a page something other than a snowman for January- but it is a tradition of mine that I just couldn't break!  With all of the snow here is Iowa, to me January is all about snowflakes & snowmen.  And the sentiment I used here perfectly sums it up too!

stamp sets:  'White Christmas', 'Project Life Holiday Cheer' & 'Cheerful Tags'
ink:  Black Memento, Marina Mist
markers:  Marina Mist & Pumpkin Pie
cs:  Whisper White, Marina Mist, Basic Black
supplies:  1" Circle Punch, 1 1/4" Scalloped Circle Punch, 1 3/8" Circle Punch, 2 Way Glue Pen, Dazzling Diamonds Glitter, dimensionals

How did I make the little circle on New Years Day?  I used a pencil eraser tapped into my ink pad!  Isn't that cool!
 +++++++++
I had a fun night stamping with everyone last night that joined me to make their calendars.  Several of the ladies were making multiple ones to give away as Christmas gifts, so it was a late night of stamping again.  Then I worked a few more hours after they left cutting more card stock, getting ready for more calendar classes-so it was a short night.

I have more sessions of calendar classes today here at our home.  It will be another fun, yet long day & a late night of stamping!  I am looking forward to spending my day with everyone joining me today to stamp!  They will be here soon.  Woo Hoo!

I hope you have a SENSATIONAL Saturday!!
Happy Stamping!!
Hugs!
SUSIE

Sunday, May 20, 2018

'In Every Season' (& more) Sneak Peeks!

Wow- I love it!!  This flower stamp set is a new set in the upcoming annual catalog called- 'In Every Season'!  I also used the new 'Detailed with Love' stamp set for the words.  Isn't this just a beautiful card.  I made it for a dear friend for her birthday!!  And also made another one like it (without words) to send to a downline of mine that had surgery a couple of weeks ago.  It is just sooo much fun stamping with new products & sharing new ideas!

There is alot of NEW products that I used here.  

Check out this NEW In Color called- Pineapple Punch!  It is a bright yellow!! 
And yes- there is coordinating DSP too to match all of the NEW In Colors!  It is strips & polka dots!  Check them out!

And look at this gorgeous NEW Polka Dot Tulle ribbon!  It is soooo cool!!   
I made this a window card by punching out a circle on the front layer of the card.  And then added punched out layers to it to add dimension & more color!
These are the circle layers I made to add to the front of the card.

stamp set:  'In Every Season' & 'Detailed with Love'
card stock:  Pineapple Punch, Whisper White
designer paper:  6x6 2018-2020 In Color DSP
ink:  Black Stazon
Stampin' Write Markers:  Call Me Clover, Pineapple Punch, Crushed Curry
other:  Wink of Steall, 1 3/4" Circle Punch, Layering Circles Framelits, Big Shot, Magnetic Platform (2 1/2" size), 2 1/4" Starburst Punch, 2" Circle Punch, dimensionals, glue dots, Polka Dot Tulle Ribbon, Basic Pearls, Everyday Label Punch (using a 1" strip of card stock)
+++++++++
I was on the go all day again yesterday!!  I was up early to get things cleaned up from Friday nights class & ready for yesterday mornings group to come stamp.  It was a fun morning of stamping with all that joined me.  Yesterday afternoon I went to our (nephew Jordan Woods' fiancee), Shannon's bridal shower with Amanda, Sarah (& kids) & my sister-in-law Pam.  When I got home I burnt the midnight oil cutting card stock!

This morning I'm up early to finish getting everything all packed up & ready to head out.  I'm off to Hiawatha today to join many that are coming to stamp with me today.  I have a morning & an afternoon class there.  Ruth & Denise are my hostesses.  I am looking forward to seeing everyone  & spend our time stamping together! 

Tonight we are going to Nathan & Sarah's, along with Manda, Steve & all of the kids- to have supper & a belated Mother's Day supper!

I've gotta run......
I hope you have a WONDERFUL Sunday!!
Happy Stamping!
Hugs-
SUSIE

Friday, November 30, 2018

And they go!

So today is the LAST day that any of the Snowflake Showcase products are available!


Yesterday I hadn't planned to share any more projects using these products.
But last night I created these 2 cards & I just had to share them with you!!

One of them makes me think of winter!
And the other one of them makes me think of spring!

They are both clean & simple & CUTE!

Be sure to look at them closely, as you get a SNEAK PEEK of some NEW products 
that will be available in January 2019 in the NEW Occasions Catalog!  
Check out this cool NEW Gingham DSP!
And this NEW White Burlap!
Oh- I love them both!
stamp set:  'Snow is Glistening'
card stock:  Balmy Blue, Whisper White
designer paper:  NEW in Occasions Catalog in January 2019
ink:  Balmy Blue
other:  1" circle Punch, 1 3/8" Scalloped Circle Punch, NEW White Burlap Ribbon- in Occasions Catalog in January 2019; Epoxy Droplets, Dimensionals, Glue Dots
 
And then check out this one!!
The words & the flower stems/leaves are in the 'Happiness Surrounds' stamp set.
BUT check out the beautiful Highland Heater DSP & the little flower punch!
Yes- we have a new little punch pack set of flowers!!  
I'm super excited about this, as you know how I love punches!
These new products are both sneak peeks from the upcoming 
Occasions Catalog that stars in January 2019!
stamp set:  'Happiness Surrounds'
card stock:  Highland Heather, Mint Macaron, Whisper White
designer paper:  NEW in Occasions Catalog in January 2019
ink:  Highland Heather, Mint Macron
other:  Nature's Twine (Mint Macron), Basic Pearls, 1 3/4" Circle Punch, 1 1/2" Circle Punch, 1 3/8" Scalloped Circle Punch, dimensionals, Glue dots, Little Flower Punch- in Occasions Catalog in January 2019
++++++++
Yesterday was a busy day with the kids.  And last night I burnt the midnight oil stamping.  

This morning the boys will come here, I'll take the twins to school, as there is a 2 hour delay due to flog, ice, etc.  I will then be home alone until later this afternoon, as Nathan is keeping the 3 little ones for me today.  I have LOTS of stamping I need to get done today & tonight for December calendar classes!  Tonight I'll be headed out to work on the farm for awhile helping Deke move some pigs too.  And I'll burn the midnight oil cutting card stock!

Gotta run.....
I hope you have a FABULOUS Friday!
Happy Stamping!
Hugs-
SUSIE

Monday, January 14, 2013

A cool 'Crossy My Heart' card with a Soda Pop Top!


Happy Monday!  
WOW.....hope you have a great start today to your week!
I know I had a busy week this past week stamping!
I love sharing my love of stamping with everyone.

Kathy & Karen had a super party yesterday!!  
It was a very cold day, but a perfect way to spend the day stamping inside a warm building with lots of friends.  
Good company & good food!  
What more could you ask for? 
I LOVE Stampin' UP!
Here is a cool card that we did at my workshops the past week.  
It is a cool 'Crossword' card with a twist!  
Notice the awesome Soda Pop Top!  
I used it to hold the Top Note Die piece shut. 
 'Cross My Heart' & 'Collage Curios'
cs:  Real Red, Basic Gray, Very Vanilla
More Amore Specialty Designer Paper
Naturals Designer Series 12x12 Paper Stack
ink:  Basic Gray
supplies:  Big Shot, Top Note Die, Soda Pop Top, 2 1/2" Circle punch, 2 3/8" Scallop Circle punch, 1" Circle punch, Basic Gray/Basic Black 1 1/4" Two Toned ribbon, glue dots, dimensionals, Stampin' Mat, Paper-Piercing tool, small heart punch, (retired 3 heart punch)

Going to enjoy my day with the twins!
We may just hang out in jammies all day!

I have lots of stamping to do!!
I am donating a basket(s) of cards to the Sigourney Basketball teams for their cancer silent auction fundraiser that is tomorrow night!
Wish me luck in getting lots of cards created for them.

I hope you have a great day!
Happy Stamping!
Hugs!
SUSIE

Thursday, May 9, 2019

A NEW Catalog Sneak Peek!

Today I'm sharing a card where I'm combining something NEW with some OLD.  

Aren't these birds just totally adorable!!  They are from a new stamp set- 'Free As A Bird' that will be available to purchase starting on June 4th when the NEW Annual Catalog goes live.  This stamp set is super cute!!  I have some other cards made with it already & I will be sharing them with you in the coming weeks. 

This card is one that all of my team & (demo friends too), that joined me to stamp last month in Minneapolis, after On Stage, made at our Supper/Stamping Night Event.  

This card is a similar to one I did for my April monthly stamp classes too- I just changed the stamp set.  You can see that card by clicking HERE!!

Let me know what you think?  Do you like these birds?
stamp set: 'Vertical Greetings' -RETIRING & 'Free As A Bird'- NEW in June 2019
card stock:  

  • Shaded Spruce- 5 1/2 x 8 1/2"- score at 4 1/4- fold in half for card base; 3 1/4 x 3 1/4; 2 3/4" strip- punch out circle with the 2 1/4" Circle Punch
  • Mint Macaron- 5 x 3 3/4"
  • Whisper White- 5 x 4 1/4"- for inside of the card; 2 3/4" strip- stamp birds on it & punch it out with the 2" Circle Punch
designer paper:  Nature's Poem DSP- 3 x 3"- RETIRING
ink:  Shaded Spruce
Stampin Blends:   Dark Mint, Light & Dark Crumb Cake, Bronze
other:  2 1/4" Circle Punch, 2" Circle Punch, Big Shot-RETIRING, Standard Platform-RETIRING, Petal Pair Embossing Folder- RETIRING, Nature's Twine (Mint Macaron-)- 6", Dimensionals, Glue Dots, Wink of Stella
+++++++++
Yesterday was a busy day with the kids.  We played games, cards & all kinds of things all morning.  I was trying to keep them busy.  It was too cold & wet outside to play there.   

Last night I met my mom in Sigourney & we went to the Keokuk County Hospice Service.  It was very nice!  I am glad that I went.  My step-dad, Dick was one of the many loved ones that was honored at this service.  My Aunt Virginia, step sisters, Debbie & Brenda & Debbie's daughter came too. 

This morning I'm off to Manda's.  I'll take the twins to school & spend my day with the 3 little ones.  School gets out early today, so the 3 big boys will ride the bus & be here early.  Tonight I have lots of stamping stuff I have to get done when everyone has gone home.  Deke is home all day to work on the farm, as he is power washing, trying to get for baby piggies.  

I hope you have a GREAT Thursday!!
Happy Stamping!
Hugs-
SUSIE

Monday, April 23, 2012

A new week!!!!!

This is a quiet week for me......even though we have LOTS to do it is much calmer than my normal.

I don't have any more stamping events on my calendar until Sunday, May 5th.  Sue is my hostess that day!!  We'll just have gotten home the day before from our Stampin' UP! Disney trip.......so I'll be excited with new things to share!!!  I'll then be back in the saddle with 3 other stamping workshop that week- one at my home & one with my gals in CR.  PLUS I'll be meeting with my downline group too!!  Lots to look forward to the week we return. :)

Early next Sunday morning, April 29th- Deke, Brayden & I will be heading for our Stampin' UP! Disney trip to Orlando!!  We've never been to Disney before & to make it even more special- G'ma & G'pa are taking Brayden along this year & we will get to celebrate his 4th Birthday on May 1st- while we are there!!  He is excited to get to see Mickey & Minnie.  I honestly don't think he has a clue that there will be so much more there than just Mickey!  We have a chart & are counting down the days!  :)  Someday hopefully we'll get to return to Disney & take Brody & Drake along too!!  G'ma will miss them so much while we are gone.....gosh- I see them daily!!  I'm sure they will have changed tons those few days that we are away.

I want to thank all of my wonderful customer friends for helping me to earn this special trip!  I earned this trip based upon my yearly personal sales.  And I can't say that it was easy!!  I worked hard & held lots & lots of stamping workshops!!  If it weren't for you attending my events & ordering from me- I'd never have earned this special honor.  I treasure you all & thank you from the bottom of my heart!  I love sharing my love of stamping with each of you!!  And I look forward to seeing you at my next event & stamping!!  Stampin' UP! is an amazing company & has brought so much to my life! 

On our Stampin 'UP! trips I so look forward to seeing so many of my demonstrator friends (LeeAnn, Missy, Robin, Di, Kelly, Carol, Jane, Tiffany, Ann, Heather, Mary, Dawn, etc.)!  It will be especially special this year to see many of their families along with them.  I can't wait!!! It will be fun for Brayden to meet new friends too!  We plan to spend some time with my dear demonstrator friend Christy & her husband Keith- as this will be Christy's first SU! incentive trip (WAHOO) & her words on Saturday were that 'it will be fun to see Disney through the eyes of a child', meaning being around Brayden!!  :)  How true!!

I will hopefully be able to have internet connection while we are gone & post daily so you can keep up on us while on our trip!

We are especially grateful that Deke's sister Darci is going to be staying at our home while we are gone so that she can help her dad do our chores with the pigs & take care of my dog & cats.  Nathan usually takes care of things on the farm while we are gone, but with his job change this year at principal at Pekin it was going to be too hard from him to do them.  Thankfully he will still check in with Darci & help after school & make sure the feed is ground & things are going ok.  

Today I want to share a cool card that we did at my Spring STYC last Saturday!  This class was a techniques class.  Everyone made 29 cards!!  (WOW- YES- LOTS!!)  And they all learned something new!!  It was a FUN FILLED DAY OF STAMPING!!!


This beautiful card is the chalk board technique.  It is very striking!  There are different ways to create this look.  I did it by stamping the images with white craft ink onto black card stock, then heat dry the ink (so it doesn't smear) & using sponge daubers I tapped pastel chalks onto the images.  Too cool huh!

'Flower Fest' (retiring) &'Three Little Words' (retiring)
cs:  Old Olive, Rich Razzleberry, Basic Black
ink:  White CRAFT ink, Basic Black
supplies:  Big Shot, Perfect Polka Dots embossing folder, Clear Circle Bigz die, Large Scallop Circle Bigz die, Large Oval punch, Fancy Flower punch, Blossom Petals Builder punch, Basic Pearls, dimensionals

Have a great week!!!
ENJOY!
Happy Stamping!
SUSIE


Monday, July 9, 2012

'Quint-Essential Flower' has endless possibilities...........

HI!
Happy Monday!!

Wow- what a FUN day I had yesterday with a building full of stampers!
I think that it worked out pretty good with having one party & 2 hostesses.
Thanks to all of you that joined us for a great afternoon.
Wonderful company, cute cards & yummy food- what more could you ask for?
 
Here is another card that I did at my workshop yesterday.
I've seen several cards using this new die in many different ways.
Infact- Dawn did one at my downline meeting- will get that posted sometime soon.
The inspiration for this card came from her original idea.

Note the NEW Oval Accent Bigz Clear die.
It is folded in half & used as the flap to open the card.
The card is held shut with a belly bad.
And I used the new 'Quint-Essential Flower' stamp & punches!
'Quint-Essentials' & 'Wacky Wishes'
cs:  Calypso Coral, Lucky Limeade & Whisper White
Floral District designer paper
ink:  Calypso Coral & Lucky Limeade
supplies:  Big Shot, Oval Accent Bigz Clear die, Polka Dots emobssing folder, Lucky Limeade ruffled ribbon, Pearls, 2 1/2" circle punch, Boho Blossom punch, 2 3/8" scallop circle punch, 1 3/4" scallop circle punch, dimensionals, glue dots
Here is a picture with the belly band off.
Notice that I saved the outside of the flower that I punched off & used it on the 
inside around my words.
There are LOTS of different punches that coordinate with this
 amazing little flower stamp.
2 3/8" scallop circle punch
1 3/4" scallop circle punch
1" circle punch
3/4" circle punch
1/2" circle punch

Have a wonderful day!
Happy Stamping!
ENJOY!
SUSIE

Saturday, February 17, 2018

'Petal Palette'- spotlighting


Here is a beautiful "spotlighting technique" card.  

My downline Dawn Keline shared a card similar to this one at our team meeting in January.  The Petal Passion Designer Paper that I used here just works perfectly for doing this cool technique.

The "spotlighting technique" is often done on a collage stamped card.  And this Petal Passions Designer Paper is the perfect collage images.  

How did I do this?
  • I punched a circle out of this Petal Passion Designer Paper using the 2" Circle Punch.  
  • I colored the flowers in the punched out circle using the Stampin' Blends. 
  • I added the Wink of Stella over the top of the colored flowers.
  • I punched a Black Circle to layer behind the colored flowers using the 2 1/4" Circle Punch.  
  • Using dimensionals I put the layered flower circle back over the top of the piece that I punched out. 
Isn't it just so clean, simple & pretty!!  
 
stamp set:  'Petal Palette'
card stock:  Calypso Coral, Basic Black, Whisper White
designer paper:  Petal Passion DSP
ink:  Archival Basic Black
Stampin' Blends:  Calypso Coral, Old Olive, Rich Razzleberry, Pink Pirouette
other:  2" Circle Punch, 2 1/4" Circle Punch, Dimensionals
++++++++
This morning Deke is up early to chore & head to the courthouse for a meeting.  I'm up early to walk & then headed to town to run some errands.  I'm then going to hide the rest of the weekend, working on tax stuff that I have to get done.  

I hope you have a SENSATIONAL Saturday!!
Happy Stamping!
Hugs-
SUSIE


Sunday, September 13, 2020

TRY THIS SKETCH

 Here is this weeks TRY THIS SKETCH!
 
Basic Black- 5 1/2 x 8 1/2"- score at 4 1/4"- fold in half for card base
Smoky Slate- 4 1/4 x 3"
Basic Gray- 3 1/2 x 4 3/4"
Whisper White- Circles- approx. 2 1/4" & 1 1/2"
 
Here is my version of it!
 So what do you think?

I like the way it turned out.....clean & simple, yet elegant.
The Gold Hoop Embellishment adds that added dimension to it.
 I used some of my favorite words.
They are from the 'Beautiful Autumn' stamp set on page 46 in the Holiday Mini Catalog.

Where did I get the leaves from?
They are actually the from the Perennial Flowers punch & 
I cut the petals off & tucked them underneath the Daisy.

 Here are all of the supplies & measurements so that you can make this card too!

stamp set: 'Beautiful Autumn'
card stock:
  • Thick Whisper White- 5 1/2 x 8 1/2"- score at 4 1/4"- fold in half for card base
  • Bumble Bee- 2" strip- punch out 2 Daisies; 3" strip- die cut 2 1/2" Circle
  • Whisper White- 3 1/4 x 4 3/4"; 2 1/2" strip- stamp words onto & punch out using the 2 1/4" Circle Punch; 4 x 5 1/4"- for inside of card
  • Old Olive- 2" strip- punch out 2 petals from the Perennial Flowers Punch for the leaves
  • Early Espresso- 3/4" strip- punch out 1/2' Circle
designer paper:  Plaid Tidings- 4 1/4 x 3"
ink:  Early Espresso
other:  Stampin' Cut & Emboss Machine; Layering Circle Dies (for large Circle, approx. 2 1/2"); Perennial Flower Punch (for leaves); Medium Daisy Punch; Gold Hoop Embellishment; Multipurpose Liquid Glue (to attach the Gold Hoop to the Whisper White Circle; dimensionals; glue dots; 2 1/4" Circle Punch
RETIRED:  1/2" Circle Punch- for center of Daisy
 
I hope you have a SUPER Sunday!!
Happy Stamping!
Hugs-
SUSIE

Thursday, January 18, 2024

Cutest Cow Bundle

Here is another CUTE black & white cow card!!
Check it out as it is a FUN rocker card! 

This is one of the cards that everyone stamping with me
at my January monthly classes will be making.
  
I used the NEW
#162897- Cutest Cows Bundle= $41.25- Spring Mini- pg. 53.
This cow was punch out with the Cutest Cows Builder PUNCH!
 
You can see 2 other cow cards I made by clicking on the link below.
This is what the card looks like when it is opened up!
Here are the measurements & supplies.
stamp set:  'Cutest Cow'
card stock:
  • Basic Black-5 3/4 x 5 3/4"- die cut circle & fold in half for card base
  • Basic Black- 3 1/2" strip- die cut circle
  • Basic Black- 2 3/4" strip- die cut circle
  • Basic White- 2 3/4" strip- stamp cow onto & punch out
  • Basic White- 3" strip- die cut circle
  • Basic White- 1/2" strip- stamp words onto & diagonally cut ends
  • Basic White- 5 1/4 x 5 1/4" strip- die cut circle & cut in half- for the inside of the card
designer paper:  Rock & Roll DSP- 
  • 5 1/4" x 5 1/4"- die cut circle & cut in half
ink:  Memento
Stampin' Blends:  Dark Basic Black; Light Petal Pink
other:  Stampin' Cut & Emboss Machine; Cutest Cow Builder Punch; Bakers Twine Essential Pack (white); dimensionals; glue dots
OnLine Exclusive: #162286- Deckled Circle Dies= $37.00
 
I hope you have a great Thursday!!
Happy Stamping!
Hugs-
SUSIE

Tuesday, August 3, 2021

Peaceful Deer Bundle Fun Fold

 Here is a totally Susie card!
I LOVE this NEW Peaceful Deer Bundle!
IT just makes me smile.
My head just spins with ideas using it!
And the Deer is a PUNCH!
WOO HOO!!

This is a really cute fun fold card.
The center circle flips up & shows on the inside of the card when it is opened up.
Isn't this so cool!
++++++++++++++++++++++++++++++++++++++
So how did I do it?

#1.  Die cut circle window in card front.  
SAVE this piece as you'll use to layer the other circles/deer onto later.  
 #2.  Stamp words onto the lower part of the inside Basic White cardstock & then adhere to inside of card.


#3.  Make a box like this & add adhesive to the 1/4" strip & put together to form a box.

This is a 2 1/4 x 4 1/4" strip- score at 1/2", 1", 2", 3" & 4".

Here is the pattern you'll need to make the box above!
#4.  Adhere the box to the inside of the card as shown above.  
Put the box in the CENTER & close to the center fold of the card. 
Have the adhesive on it downward onto the Basic White card stock that is the inside base piece. 
 
#5.  You'll add adhesive along the lower part of the inside card front & then close the card.  
The card front will now be stuck down to the box top! 
 
#6.  I added the DSP strips & words onto the card front.
 #7.  Now you'll put adhesive on a little tab you make- like shown here on the right side.
 This is the pattern for the tab you'll need.
It is 3/4 x 2" & score it in half at 1".
#8. You'll fold the tab in half & adhere it down onto the box top.  
Make sure that the TOP (open) end of the tab is up & adhere it to the middle/top part of the box as shown here above.
You'll now add a piece of adhesive to this tab (on the top side) too!
*So yes- BOTH folded sides of this tab have adhesive onto them.

#9.  You'll put the 3 circles together.
With the card shut- you'll adhere the circle pieces to the center tab that is on the box top shown in the photo above for step #8.
#10.  You'll then add the deer. 
#11.  Your card is complete!
Here are the supplies & measurements.
stamp set:  'Peaceful Deer'
card stock:
  • Old Olive- 5 1/2 x 8 1/2"- score at 4 1/4"- fold in half for card base.  Cut circle out of center front of this piece.  Save circle to layer other circles onto & reattach later to fit into card front "window".
  • Basic White- 4 x 5 1/4"- for card inside.  Stamp words on lower part of this & adhere to inside of card.
  • Old Olive- 2 1/4 x 4 1/4"-  score at 1/4"; 1", 2", 3"; 4".  Add adhesive to the 1/4" scored piece to make a box. 
  • Old Olive- 3/4 x 2"- score at 1"- fold in half
  • Crumb Cake- 3 1/4" strip- die cut scalloped circle
  • Basic White- 2 3/4" strip- die cut circle.  Stamp trees onto this.
  • Crumb Cake- 2" strip- stamp deer onto & punch out.
  • Crumb Cake- 1/4 x 3 1/4"- attach along bottom center of card front.
  • Basic White- 1/2 x 3 1/4"- stamp words in center & flag ends with the Banners Pick A Punch
dsp:  Heartwarming Hugs DSP- 1 x 4" (x2)
inks:  Old Olive & Memento
other:  Stampin' Cut & Emboss Machine; Layering Circle Dies; Deer Builder Punch; Banners Pick A Punch; Subtle Shimmer Sequins; dimensionals; glue dots; Simply Scored Scoring Tool
 I made several of these cards for a swap I did with some demonstrator friends!

I hope you have a TERRIFIC Tuesday!!
Happy Stamping!
Hugs-
SUSIE

Thursday, October 25, 2012

A circle SNOW FLURRY!

Good morning!
Today I want to share a pretty Snow Flurry die (circle) card.
I've been cutting so many beautiful snowflakes out of the Silver Glimmer Paper & just could throw that image away......so this is one of the cards I created with it.
'Greetings of the Season'
cs:  Elegant Eggplant, Whisper White
Silver Glimmer 12x12 Paper
 ink:  Elegant Eggplant
supplies:  Big Shot, Snow Flurry Bigz die, 1/2" circle punch, Basic Rhinestones, glue dots, dimensional
This is another one of my Stamp 'Til You Cramp projects.

OPPS......I bet you are wondering how I made the circle.
Well- I used a product that was retired & didn't realize that until I went to type up this post, as I was looking up the name of the product in the catalog to let you know what I used.
I used the Clear Circle die & see- it fit perfectly!
Oh my gosh.....I never do that!!
I can't believe it- I'm sorry!!
BUT everything is already cut for this card- so we'll be making it anyways.
(And I made another one with a different layout using the same Clear Circle & Snow Flurry dies-which I will post tomorrow.)
I am wondering if the Scallop Circle or the Scallop Square dies that are still available would have worked too.
I'll have to try it sometime & let you know.   
Have a great day!
Happy Stamping!
ENJOY!
SUSIE

Wednesday, January 24, 2024

Adorning Hearts Rocker card

Here is another fun rocker card! 
It turned out so cute!

I used the
#162569- Adoring Hearts Hybrid Embossing Folder/Die= 53.00- Spring Mini pg. 18
#162976- Most Adored Specialty DSP= FREE Sale-a-bration choice
with a $50 product order- pg. 9 
So what do you think?
 
Here are the supplies & measurements.
stamp set:  'Adorning Hearts'
card stock:
  • Real Red- 5 3/4 x 5 3/4"- die cut circle & fold in half for card base
  • Real Red- 3 1/2" strip- die cut circle
  • Real Red- 1" strip- die cut heart
  • Gold Foil- 2 3/4" strip- die cut circle
  • Gold Foil- 1" strip- die cut hearts
  • Gold Foil- 1 3/4" strip- die cut heart
  • Basic White- 1" strip- stamp words & die cut
  • Basic White- 5 1/4 x 5 1/4"- die cut circle & cut in half- for the inside of card (use the other half for another card)
designer paper:  Most Adored Specialty DSP- FREE Sale-a-bration choice with a $50 product order
  • 5 1/4 x 5 1/4"- die cut circle & cut in half (save other half for another project)
  • 2 3/4" strip- die cut circle
ink:  Real Red
other:  Stampin' Cut & Emboss Machine; Adorning Hearts Hybrid Embossing Folder/Die; Simply Elegant Trim (Gold); dimensionals; glue dots
OnLine Exclusive: #162286- Deckled Circle Dies= $37.00
 
I hope you have a WONDERFUL Wednesday!
Happy Stamping!
Hugs-
SUSIE

Wednesday, November 13, 2019

Turkey!!

Thanksgiving day is only a couple of weeks away!!  Check out this cute turkey!!  I really like this card!

This one of the cards that everyone made at my Holiday Extravaganza.  

I used the adorable set called- 'Birds of a Feather'.  It is in the Holiday Catalog on page 50.  There are 4 different kind of birds in this set- turkey, canary, chicken & duck.
stamp set:  'Birds of a Feather'
card stock:
  • Crumb Cake- 5 1/2 x 8 1/2"- score at 4 1/4", for in half for card base; 3 3/4 x 1"; 2 3/4" strip- stamp turkey onto & die cut out with Layering Circle Dies
  • Early Espresso- 5 x 3 3/4"
  • Pumpkin Pie- 2 3/4" strip- punch out with 2" Circle Punch
  • Whisper White- 4 x 5 1/4"- for inside of card; 4 1 4/x 2 1/4"; 1 3/4" strip- stamp words onto & punch out with 1 1/2" Circle Punch
designer paper:  Magnolia Lane DSP- 4 x 2"
ink:  Memento
Stampin' Blends: Light colors of-Pumpkin Pie, Mango Melody, Basic Black, Crumb Cake, Petal Pink
other:  White Chalk Marker, White Twine- 12"- fold in half & tie in bow, 1 1/2" Circle Punch, 2" Circle Punch, Big Shot, Magnetic Platform, Layering Circle Dies, dimensionals, glue dots
++++++++
Yesterday was a busy day!!  I took the twins to school.  Then Uncle Jerry, Aunt Kathy, Nathan, me & the kids attended the Veteran's program at the elementary.  Trey & Ainslee spent the day with me, so after the program we ran errands in town- grocery store, Dollar General & the courthouse for me to get my flu shot.  Last night was Pizza for Pops- so Nathan, Deke, Steve & Sarah's dad (Doug) took all the kids & went.  Sarah, Manda & I met them afterwards at Sweet B's for ice cream!  I then came home & worked on stampin' stuff.  We were going to do the Seeley boys' haircuts- so those got postponed for tonight's agenda.  

Deke is up early this morning to chore.  He'll spend the morning at his office in the courthouse & then go to Mt. Pleasant for a meeting.  I'm off to Manda's.  I'll take the 3 Seeley boys to school & then spend my day with Masen & Ainslee.  Tonight Susie's Hair Hut is open to get the Seeley boys hair cuts done.  I'll then work on stamping stuff when I get done.

I hope you have a WONDERFUL Wednesday!!
Happy Stamping!
Hugs-
SUSIE

Sunday, March 11, 2018

A dutch door fold- 'Magic Day' card!

Check out this cute dutch door fold card!  This is one that everyone joining me this week for my monthly March classes is making!!
I love fun folds!!  And I try to do at least one each month at my monthly classes.  This is what it looks like when it is opened up.

Measurements:
Pacific Point- 
  • 4 1/4 x 5 1/2"
  • 8 1/2 x 2 3/4"- fold in half & attach to the bottom front of the card
  • 4 1/2 x 3"
  • 2 3/4' strip- for circle punch out
Marina Mist- 
  • 4 1/4 x 2 3/4"
Whisper White-
  • 4 x 5 1/4"
  • 2 1/2 x 1 1/2"- for outside to stamp words on
  • 2 3/4" strip - to stamp image on & punch out with circle punch
Ribbon- 10"

I thought this stamp set worked perfectly for this fun fold card!!  Check out the pretty designer paper.  It is actually from the Sweet Soiree' Specialty DSP.  

My stampers got the choice of punching out the image they choose or use the coordinating Magical Mates Framelits Dies.  You should see the dragon, the unicorn & the mermaid on this card.  They are super cute too!

stamp set:  'Magical Day'
card stock:  Pacific Point, Marina Mist, Whisper White
designer paper:  Sweet Soiree' Specialty
ink:  Archival Basic Black
other:  Watercolor Pencils, Blender Pens, Pacific Point 1'4" Stitched ribbon, Dimensionals, Glue Dots, 2" Circle Punch, 1 3/4" Circle Punch, Wink of Stella
++++++
Yesterday started out with selling pigs & then a full day/night of stamping! 

This morning I'm headed out early for Hiawatha.  I have 2 classes there today!  I am looking forward to seeing everyone that is joining me & stamping with them!

I hope you have a SUPER Sunday!!
Happy Stamping!
Hugs-
SUSIE