Pages

Friday, November 10, 2017

'Season Like Christmas'

Oh Christmas Tree......this is a pretty tree!!!  It is made using the set- 'Season Like Christmas'!  

Check out the designer paper.  It is from the Christmas Around the World. 
stamp set: 'Season Like Christmas'
card stock:  Real Red, Garden Green, Whisper White
designer paper:  Christmas Around the World
ink:  Garden Green, Chocolate Chip, Real Red
other:  Quilted Christmas 1/4"Ribbon, Dimensionals, Glue Dots
+++++
We are having fun in Salt Lake City!  Yesterday's On Stage presentations were great!  

Last night I had a Leaders supper that I got to attend & it was great to get to see so many of my friends from all over!  We had a great entertainer/comedian that sang & presented for us. 

This morning we are up early & headed back to the Convention Center for a full day of presentations & classes.

I hope you have a FABULOUS Friday!!
Happy Stamping!
Hugs-
SUSIE

Thursday, November 9, 2017

A sparkly star!

Here is a sparkly star Christmas card.  I used the 'Add A Little Glitz' stamp set from the Holiday Catalog.
stamp set:  'Add A Little Glitz'
card stock:  Thick Whisper White, Whisper White, Gold Glimmer, Gold Foil
designer paper:  Year of Cheer Speciality DSP
ink:  Versamark pad
other:  1 3/4" Circle Punch, 2" Circle Punch, Year of Cheer Washi Tape, Embossing Buddy, Gold Embossing Powder, Heat Tool, Dimensionals, Big Shot, Mini Treat Bag Thinlits Dies (for tiny stars)
++++++++
We made it to Utah!  We are looking forward to our On Stag;e Stampin' Up! Event today.  And excited to see all of the new things Stampin' Up! has in store for us!

I hope you have a great Thursday!!
Happy Stamping!
Hugs-
SUSIE

Wednesday, November 8, 2017

A fall 'Painted Harvest'


This is a pretty fall card using the 'Painted Harvest' stamp set.  My inspiration for this card came from my dear stampin' friend- LeeAnn Greff.  We share & stamp together alot from afar thanks to texting & emails. 

I used the colors- Crushed Curry, Cajun Craze & Soft Suede.  They are oh so pretty together!!

Check out how I did the scalloped layer behind the 2" Circle punch.  This is something that I discovered a few years ago & shared on one of my swaps on a SU! trip.  I have done this layering before on a few other cards over the years posted on my blog, that I've done at stamp classes too.  I love that is gives a different look. 

How did I do it?
  •  2x 2 3/4" piece of card stock stock.
  • Punch both ends with the Scalloped Tag Topper Punch
  • There will be the little notches from the Tag Topper, but the circle will cover it up!
I did a quick search on my blog & found a few.......You can see some of my other cards that I layered this way by clicking on the links below-
http://stampwithsusie.blogspot.com/2016/06/oh-happy-day.html
http://stampwithsusie.blogspot.com/2016/06/yay-its-confetti-celebration.html
http://stampwithsusie.blogspot.com/2016/06/it-is-happy-day.html
stamp set:  'Painted Harvest'
card stock:  Cajun Craze, Crushed Curry, Soft Suede, Whisper White
ink:  Crushed Curry, Soft Suede, Cajun Craze
other:  Scalloped Tag Topper Punch, Banner Triple Punch, 2" Circle Punch, Jute Twine, Dimensionals, Glue Dots

+++++++
Last night was a busy night trying to get alot done before I head out.  

This morning I'm off to take the boys to school & spend part of my day with Trey.  (Sarah's grandma is coming to stay with their kids the rest of this week since I'll be gone.)  Deke is off early to chore & then he is headed to Mt. Pleasant for a meeting.  When he gets home from there I'm headed to the airport & he'll keep Trey the rest of the afternoon.  They'll be outside working- picking our corn!   

I plan to post on my blog each day while I'm in Salt Lake City, Utah, as long as all goes ok & we have internet in the hotel.  

I'm so looking forward to seeing many of my demonstrator friends from afar.  And I'm excited about spending time with my team- Lynda, Cindy & Lorraine- who are going with me!! We are meeting each other at the airport & spending the next 5 days/nights together.  
 
I can't wait to see what fun new things Stampin' Up! has in store to share with us.  I'll be excited to get home & share with all of you in the coming months.

I've gotta run......
I hope you have a WONDERFUL Wednesday!
Happy Stamping!
hugs-
SUSIE

Tuesday, November 7, 2017

A 'Seasonal Chums' snowman!

Oh.....those of you that know me & have stamped with me for year, know that I LOVE snowmen!!!  This is cute little snowman that is from the 'Seasonal Chums' stamp set in the Holiday Catalog on page 47.  It comes with framelits in a bundle too!  And it is actually a tag bundle!  I just cut off his back & didn't use it on this card, but it is very cute & cool too, so be sure you check it out!

This is another one of the many cards that we did at my Holiday Extravaganza.  I love how the big snowflake embossing folder just went perfect with this.  And the little white cut out snowflake is also one of the framelits in the Seasonal Tags Framelits Dies!  

When I add snow to a card, I often just cut a strip of card stock & rip it......and that is exactly what I did here for the snow.  I did add the Wink of Stella over the top of it to add some additional dimension & glimmer! 
The words- Seasonal Greetings that I used here comes from the 'Cheers to the Year' stamp set on page 37 of the Holiday Catalog.

I colored this cute little snowman with my Marvelous Markers!  

Oh & check out the Clear Faceted Gem in the center of the little snowflake to add some more bling!

stamp set:  'Seasonal Chums' & 'Cheers to the Year' 
card stock:  Thick Whisper White, Marina Mist, Whisper White
ink:  Archival Basic Black
markers:  Many Marvelous Markers
other:  Big Shot, Magnetic Platform, Seasonal Tags Framelits Dies, Standard Platform, Winter Wonderland Embossing Folder (big snowflake), Dimensionals, Glue Dots, Clear Faceted Gems, Wink of Stella

+++++++
Yesterday was a busy day with all 6 kids.  It is fun to get them all together & I love spending time with them.  We are blessed they are all so close by.  My friend Jenny- sent home an air hockey table game & some magnetic builders & a couple of board games with me when I saw her on Sunday.  Thus- she was a God Sent & helped to keep the boys occupied with some fun new things to do!  It was just too cold to go outside to play.  So we tried to keep busy!  We did lots of coloring, cutting & crafting too. 

Brayden did go out & help Papa patch some of the curtains on the finisher for about an hour.  He had fun!  And Papa said he was great help too!  Thankfully they were on the side where the wind wasn't blowing & it was too cold for them. 

When the kids all went home last night I entered orders, connected with hostesses & did some farm bookwork.  Deke had a meeting to go to with our engineer, so I was home alone. 

This morning I'm off to get the boys to school & spend my day with Trey, Masen & Ainslee.  We have some errands to run this morning if all goes as I have planned.

Tonight when the kids go home I'll be burning the midnight oil stamping!  And packing!!  Tomorrow I'm headed to Salt Lake, Utah to attend our Stampin' Up! On Stage event.  I have 3 of my team going with me- Lynda, Cindy & Lorraine.  I know we are all excited to see what fun new things Stampin' Up! has in store for us. 

Gotta run.....
I hope you have a TERRIFIC Tuesday!
Happy Stamping!
Hugs-
SUSIE

Monday, November 6, 2017

'Come to Bethlehem'- a HINGED card!

Here is a fun hinged card that I created for my Holiday Extravaganza.  I love the colors of this card....and these Bethlehem Edgelits Dies are just so cool too!  It is a simple, but elegant card. 
Check out how the top just hinges up to open up the card!!  

This is a fun layout that I learned to do years ago!  

Here are some other hinged cards I've made over the years & posted on my blog.....just click on the links:
https://stampwithsusie.blogspot.com/2017/09/a-spooky-cat-witches-hat.html
https://stampwithsusie.blogspot.com/2015/03/celebrating-with-this-hinge-card.html
https://stampwithsusie.blogspot.com/2012/10/full-of-blessings-such-beautiful-card.html

stamp set:  'Come to Bethlehem'
card stock:  Night of Navy, Crumb Cake, Whisper White
ink:  Night of Navy
other:  Big Shot, Magnetic Platform, Bethlehem Edgelits Dies, Standard Platform, Sparkle Embossing folder, Dimensionals, RETIRED- Candy Dot brad,  paper piercing tool, Piercing mat

+++++
WOW!  What a busy weekend of stamping!!  And doing family things.  And not getting much sleep!  

Yesterday was another great day of stamping with everyone that joined me.  Everyone seemed to love the Christmas card Stamp-A-Stack class.  I was so pleased & we now have a new annual event for everyone to look forward to doing each November.

This morning Deke & I are up early to mark, sort & load hogs at 5 a.m.  I'll then head in to get all 6 kids & spend my day with them, as there is no school again today.  Deke will chore & head to town for his weekly board meeting.  Tonight I'll work on entering orders, catching up on farm bookwork & other things!  

Gotta run.....
I hope you have a MARVELOUS Monday!!
Happy Stamping!
Hugs-
SUSIE

Sunday, November 5, 2017

'Seasonal Lantern'

This is a cute fall card using the 'Seasonal Lantern'.  

I used the Pinewood Planks Embossing Folder on the Vanilla layer piece behind the lantern. 
I used the NEW Stampin' Blends to color it with. 
  • Bronze
  • Light Daffodil Delight
  • Light Old Olive
stamp set:   'Seasonal Lantern'
card stock:  Soft Suede, Lemon Lime Twist, Very Vanilla
designer paper:  Painted Autumn
ink:  Black Memento
Stampin' Blends:  Light Old Olive, Bronze & Light Daffodil Delight
other:  Big Shot, Lantern Builder Framelits Dies, Pinewood Planks Embossing Folder, Triple Banner Punch,  3/8" Metallic Gold Edge ribbon, dimensionals, glue dots
++++++
Yesterday was a busy day!!  It was full of stamping, friends & family!!! I had a fun group come stamp with me yesterday morning.  Then we had our family photos taken at Nathan & Sarah's pond.  Then we all went to Deke's cousins daughters wedding reception.  I was beat last night when we got home.

I'm up early this morning to work on getting some Christmas Card Kits cut.  And then I'll be headed out after bit, as I have one of my monthly classes in N. Liberty today!  We are doing a Christmas Card Stamp-a-Stack!  I am looking forward to seeing everyone & stamping with them!  

I hope you have a SUPER Sunday!!
Happy Stamping!
Hugs-
SUSIE

Saturday, November 4, 2017

'Christmas Quilt'

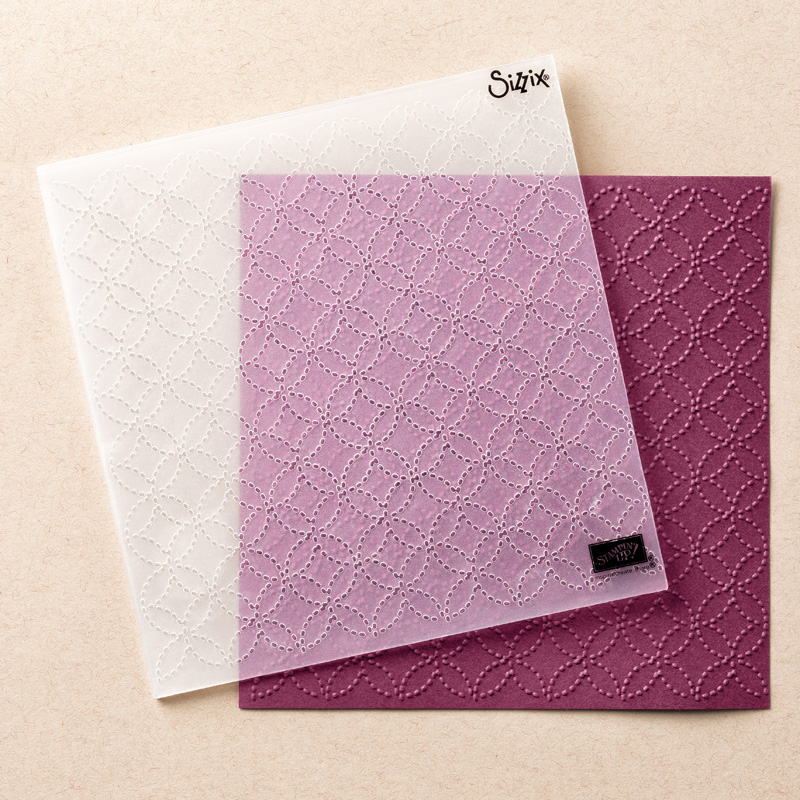
Here is another clean & simple card.  I LOVE it!  The red strip in the middle is actually embossed using the Quilt Top Embossing folder.  You can't really see it in the photos.  Here is what that Quilt Top Embossing Folder image looks like-
Quilt Top Textured Impressions Embossing Folder 
 It is pretty & very detailed.
I cut a window framelit out of the Whisper White card stock.  Then I layered behind it a 3x3 piece of the Quilted Christmas designer paper that had the star image already on it.  I did use the stitched framelit over the quilt star too. Look closely at this star below to see it.
I used the Stampin' Blend in Light Cherry Cobbler to color a Perfect White Accent for the center of the start quilt piece.  

stamp set:  'Christmas Quilt'
card stock:  Garden Green, Real Red, Whisper White
designer paper:  Quilted Christmas
ink:  Real Red
Stampin' Blend:  Light Cherry Cobbler
other:  Big Shot, Quilt Builder Framelits Dies, Perfect White Accent, Quilted Christmas 1/4" Ribbon, Quilt Top Embossing Folder, Dimensionals, Glue Dots, White Doilies
+++++
Yesterday was a busy day with all of the kids.  We had fun though.  And they all got along pretty well.  Last night I had several join me to come make Christmas cards.  It was a fun night.  I enjoyed visiting with & seeing everyone.  

Oh my......we have a crazy day!  I hope it all just clicks & works out good.  I'm getting everything ready for another Christmas Stamp-a-Stack class this morning here at our home.  Then we have our Wood Family photos taken right after lunch.  Then we have Deke's cousins daughters wedding/reception too this afternoon/evening.  I sure hope it doesn't rain at all today to spoil any of our outdoor events.  Tonight when we get home from the reception  I'll be packing up for tomorrows stamp class in N. Liberty.   And I'll be cutting some Christmas card kits.  

I hope you have SENSATIONAL Saturday!!!
Happy Stamping!
Hugs-
SUSIE

Friday, November 3, 2017

'Muscial Season'

Black & white cards are always a favorite of mine!  I thought this card is very striking.  I added Crumb Cake & Gold Foil to it too!
Clean & simple describes this pretty Christmas card.

I stamped the drummer boy on a piece of Whisper White scraps, cut him out with the Musical Instruments Framelits Dies & popping him up onto another Whisper White piece of card stock, using the Mini Dimensionals.

stamp set:  'Musical Season'
card stock:  Thick Whisper White, Crumb Cake, Silver Foil, Whisper White
designer paper:  Merry Music Specialty DSP
ink:  Basic Black Archival 
other:  Big Shot, Musical Instruments Framelits, Dies, Magnetic Platform, Gold 1/8" Ribbon, Metallic Foil Doilies (gold), Mini Dimensionals, Glue Dots
+++++++
Yesterday was a busy day with kids.  Then I worked out on the farm helping Deke sort hogs.  Thankfully Steve came & helped us too.  When we got done with that we went to Deke's aunt & uncles 50th Anniversary Surprise party.  And then I worked on stamping stuff when we got home from the party. 

It was a short night, as this morning we are up bright & early at 5 & headed out the door.  We are marking, sorting & loading hogs.  Hopefully the trucker isn't late as I need to get to Manda's to pick up the boys.  I'll then go to Nathans & pick up their 3 kids & spend my day with all 6 of them, as there is no school today!

Tonight I have Stampin' Class here at our home.  It is my first Christmas Stamp-A-Stack Class of the month!  I am looking forward to seeing everyone joining me & stamping with them tonight.

Gotta run....
I hope you have a FABULOUS Friday!!
Happy Stamping!
Hugs-
SUSIE

Thursday, November 2, 2017

'Smitten Mitten' tags!

I used the 'Smitten Mitten' stamp set & coordinating Many Mitten Framelits, along with the Merry Music Specialty Designer Paper to decorate the bags for everyone attending my Holiday Extravaganza.

Below are some photos of everything as it was all set up for my event.  I took these pictures just minutes before I unlocked the door for everyone to come in for the class.  We had a wonderful day together stamping!  I can honestly say it was pretty much a perfect day!

I am so blessed to have such a nice building that I can rent for my events.  It is within 15 minutes of our home.  It has 2 bathrooms & a small kitchen (with all of the appliances), plus great lighting, soft chairs & lots of tables!  Plus I get to set up on Friday night & clean up on Sunday.   

There were 23 tables, for the 23 projects, all set up for everyone to move table to table & make each project.  Plus they got their bags (shown above), a little test tube thank you treat I made up for each of them & a take home Make & Take kit with a Pizza Box & 3 note cards- using the Quilted Christmas DSP, with the Stitched Felt Embellishments.  

I was so happy with myself that I remembered my camera to be able to take these pictures.  But after the event I was bummed with myself, as I had wanted to get pictures of everyone stamping sometime throughout the day, but that didn't happen.  I was so busy with everything else I forgot.

We also had a yummy lunch!  I made shredded pork sandwiches, cheesy potatoes, layered lettuce salad & green beans w/bacon.  Plus many of my friends were sweet enough to bring snacks & we had a whole table full of bars, cookies & mixes!  
++++++
I burnt the midnight oil cutting card stock last night after the kids went home.

I'm off early this morning, as Manda has an early meeting!!  I'll spend my day with the 3 little ones.  The 3 bigger ones will be here for awhile, as they'll ride the bus out & school gets out early today.  Tonight when the kids go home I'm headed out to help Deke sort & move pigs.  And then we have a surprise Anniversary party for his aunt & uncle to attend later tonight too.  We won't be there too late......but we will go for a tiny bit.  

Gotta run.........
I hope you have a great Thursday!!
Happy Stamping!
Hugs-

SUSIE

Wednesday, November 1, 2017

NEW Stampin' Blends are HERE!

 
I love to color!!  And these NEW Blends are just awesome!!!  They are so smooth, so easy to use & your finished product is just beautiful!  At my Holiday Extravaganza last weekend I focused that class around using Holiday Catalog products & the NEW Stampin' Blends!! These NEW Blends were a huge hit!  You'll have to be sure to try them out sometime.  I am pretty sure you'll love them too!  

NEW Stampin' Blends Features-

  • Add just the right amount of color where you need it with the brush tip or fine-point. 
  • Each color (except Ivory and Bronze) has a light and dark shade marker, available individually or in a combo pack. 
  •  Press fit seal prevents air from entering the barrel and causing evaporation.
  • The nestable lids are easy to keep track of and have a tight fit for long-lasting color.
  • They aren't round, they have a 4 sided barrel- which is great for holding onto easy while coloring.  PLUS they don't roll off of your table!
CLICK HERE to see the NEW Stampin' Blends Brochure!
 
CHECK OUT THE 12 EXCLUSIVE STAMPIN’ UP! COLORS AVAILABLE
A light and dark shade for each.
 

'Ready for Christmas'

Can you say SOOO CUTE!!  Wow- this stamp set- 'Ready for Christmas' looked adorable in the Holiday Catalog when I first saw it.  I just kept thinking I didn't want to have to cut it all out.  Well- I finally did!  And it wasn't too hard to do!  And look how stinkin' cute it turned out! 

Growing up, my Grandma Cox had a staircase like this, with her Christmas tree at the bottom of it with the packages.  So I created this card with memories of my childhood in mind.  I love the way it turned out.  And let me tell you- that staircase was easy to cut out with the thinlits.  I was so totally impressed! 
This is another one of my many cards that I created for my Holiday Extravaganza.  I had several comment on this card that day- which made me feel good.  I had the thinlits out for them to cut out the stockings, the ornaments & the presents.  But really- those are all really easy to hand cut out with scissors.  But you definitely need the thinlits for the staircase & the garland.  

stamp set:  'Ready for Christmas'
card stock:  Wild Wasbi, Chocolate Chip, Whisper White, Real Red, Gold Glimmer
ink:  Archival Basic Black, Garden Green
markers:  Real Red, Garden Green
Stampin' Blends:  Light Cherry Cobbler- to color the Rhinestones
other:  1 1/2" Circle Punch, Big Shot, Magnetic Platform, Christmas Staircase Thinlits, Rhinestones, Dimensionals

+++++
Yesterday was a busy day with kids.  They all came Trick-or-Treating last night.  We then went to Nathan & Sarah's home for supper.  When I got home I burnt the midnight oil cutting card stock!

This morning Deke is off early to chore & head to his office at the courthouse.  I'm off to get the boys, take them to school & spend my day with the 3 little ones.  The twins get out of school early, so they will ride the bus out here.  When everyone is gone home tomorrow night I'll be burning the midnight oil cutting card stock! 

I hope you have a WONDERFUL Wednesday!!
Happy Stamping!
Hugs-
SUSIE

Tuesday, October 31, 2017

Happy Halloween!!

Our Trick-or-Treaters!
Image may contain: 2 people, people smiling, people standing
Masen, Brayden & Ainslee

Image may contain: 2 people, people smiling, people standing and outdoor
Drake, Brody & Trey

Image may contain: 4 people, people smiling, people sitting

'Gourd Goodness'

Happy Halloween everyone!!!   I hope your day is Spooktacular!!! 

Todays card is a traditional pumpkin card......and don't these pumpkins look so real! They are from the stamp set- 'Gourd Goodness'.  I think this card would make a great Thanksgiving card too!  Especially with the words I added to the front of it.  The words in this stamp set- 'Paisleys & Posies' are just some of my favorite words ever! 
This is an easy 2 step stamp for these pumpkins!  I stamped the more solid image pumpkins in Crushed Curry first.  And then I stamped over them with the more detailed stamp, using Pumpkin Pie.  

I used the Light Crumb Cake NEW Stampin' Blend underneath the pumpkins!  And the dots are from the stamp set- 'Timeless Textures'.

Look closely at the background, as it is embossed with the Pinewood Embossing Folder.

For the bow I used the Jute Twine.  It has 3 strands wrapped together, so I pulled them apart- which made the kind of crinkled.  I liked the different texture look of it this way.  And it is also less bulky when you go to mail it too!  Plus it goes alot farther!  

stamp sets:  'Gourd Goodness', Timeless Textures' & 'Paisleys & Posies'
card stock:  Early Espresso, Crumb Cake, Very Vanilla, Pumpkin Pie
designer paper:  Painted Autumn
inks:  Pumpkin Pie, Crushed Curry, Early Espresso
Stampin' Blends:  Light Crumb Cake
other:  Big Shot, Pinewood Embossing Folder, Jute Twine, Paper Snips, Glue Dots, Dimensionals
++++++
Yesterday was a busy day with the 3 litter kids.  The 3 big boys were here just a little bit right after school.  Mondays are always days of catching up from the weekend of being gone to stamp classes & getting the kids back into my routine here.  As of the moment, everyone is healthy!  I pray it stays that way!   I have my fingers crossed forsure! 
 
Last night I worked on farm bookwork, did some stamping stuff & worked on our pile of laundry!  
 
This morning I'm off to pick up kids & spend the day with the little ones.  Tonight I'll be cutting card stock!!  I have 3 of my 5 Christmas Stamp-a-Stack classes this coming weekend, so I have lots of cutting to do!  You can see those cards BY CLICKING HERE!   
 
Gotta run.....
I hope you have a TERRIFIC Tuesday!!
Happy Stamping!
Hugs-
SUSIE 

Monday, October 30, 2017

'Every Good Wish'

Here is a fun card using the NEW Stampin' Blends!!

This stamp set is called- "Every Good Wish".  I love how it is a solid image stamp, thus the inside words of 'be merry' were left white.  So I took my Light & Dark Old Olive Stampin' Blends & colored the words in.  I then added the Wink of Stella over the top of it.

Look closely at the Basic Rhinestones in the middle of the holly leaves.  I colored the rhinestones with the Dark Cherry Cobbler Stampin' Blend!
stamp set:  'Every Good Wish'
card stock:  Old Olive, Cherry Cobbler, Whisper White
designer paper:  Merry Little Christmas
ink:  Cherry Cobbler, Old Olive
Stampin' Blend:  Dark & Light Old Olive & Dark Cherry Cobbler
other:  Big Shot, 1 1/4" Circle Punch, 1 1/2" Circle Punch, Basic Rhinestones, Big Shot, Holly Embossing Folder, 1/8" Sheer Old Olive Ribbon, Dimensionals, Glue Dots

+++++++
I spent my whole day in South English yesterday stamping & cleaning up from my Holiday Extravaganza Class.  I had a few demonstrator friends from afar come help me & they did some stamping too!  It was a fun day!! And I so enjoyed getting to catch up with them, as we rarely see each other.  And bless Deke for coming to help put away tables/chairs, vaccum, load up our vehicles there & unload everything when we got home.  He has helped me tons the past 3 weeks for this big weekend event & I am thankful for all he did!

Last night I burnt the midnight oil working on my upcoming Christmas Card Stamp A Stack projects! 

This morning Deke is up early to chore & head to the office for his weekly board meeting.  I'm up early to work on stamping stuff & then go get the boys, take the twins to school & spend my day with the 3 little ones.  

Tonight I'll be working on stamping stuff again!!
I hope you have a MARVELOUS Monday!!
Happy Stamping!
Hugs-
SUSIE

Sunday, October 29, 2017

'Christmas Sweaters'

Check out this fun card!!  Isn't this Santa cute!!  

This was a fun card that I created for my Holiday Extravaganza class yesterday!!

I colored it with the NEW Stampin' Blends!!  And I added the Wink of Stella to his beard, mustache, & fur on his hat.  

This card is a gift card holder.  I forgot to take a picture of the inside of it.....  You can see a picture of another card I made in August for Nathan's birthday, using this same fold though by
 CLICKING HERE!
Check out how I I colored a White Accent with the Olive Blends.  Cool huh!

stamp set:  'Christmas Sweater' & 'Best Gifts' (words)
card stock:  
  • Old Olive- 4 1/4 x 11- score at 2 1/2" & 5 1/2"for the card base; 3 3/4" x 3 1/2"
  • Real Red-
  • Whisper White-
designer paper:  
  • Christmas Around the World
ink:  Black Memento
Stampin' Blends:  Dark Old Olive, Light Cherry Cobbler, Ivory
other:  Everyday Label Punch, Tear & Tape, Wink of Stella, Dimensionals, White Accents
Here are the 3 colors of the NEW Stampin' Blends that I used- 
  • Dark Old Olive
  • Light Cherry Cobbler
  • Ivory
+++++++
WOW!  What a GREAT day of stamping we had  yesterday!!  It was pretty much a perfect day of stamping & sharing with lots of friends.  I think everyone had a good time.  And they went home with a ton of projects & new ideas!  I spent many hours/weeks working on making this big event to be a very special day!!  And I have to give a big shout out to my wonderful husband (Deke) for helping me with doing so much of the Big Shot cutting for me!!  

I'm off this morning to spend my day in South English again, to clean up from my yesterday's event. And I have a few of my demonstrator friends from afar coming to help me- so I'm looking forward to getting to see them, visiting & stamping together with them.

I hope you have a SUPER Sunday!!
Happy Stamping!
Hugs-

SUSIE