Pages

Tuesday, August 10, 2021

Sale-a-bration Summer Shadow Dies with Beautifully Penned DSP Corner Latch Fun Fold

 Clean, simple, elegant!
Wow....yes I think that all of these words could be mentioned about this card.
It is a pretty black & white fun fold.
This is called the Corner Latch Fun Fold!
 I used 2 of the Sale-a-bration choices on this card.
  • The Beautifully Penned DSP- FREE with a $50 product order
  • Summer Shadows- FREE with a $100 product order
Did you know that these Summer Shadow Dies coordinate with the 
Shaded Summer stamps set that can be found on page 75 in the Annual Catalog!!
Wow- isn't that cool!
How about adding some color?
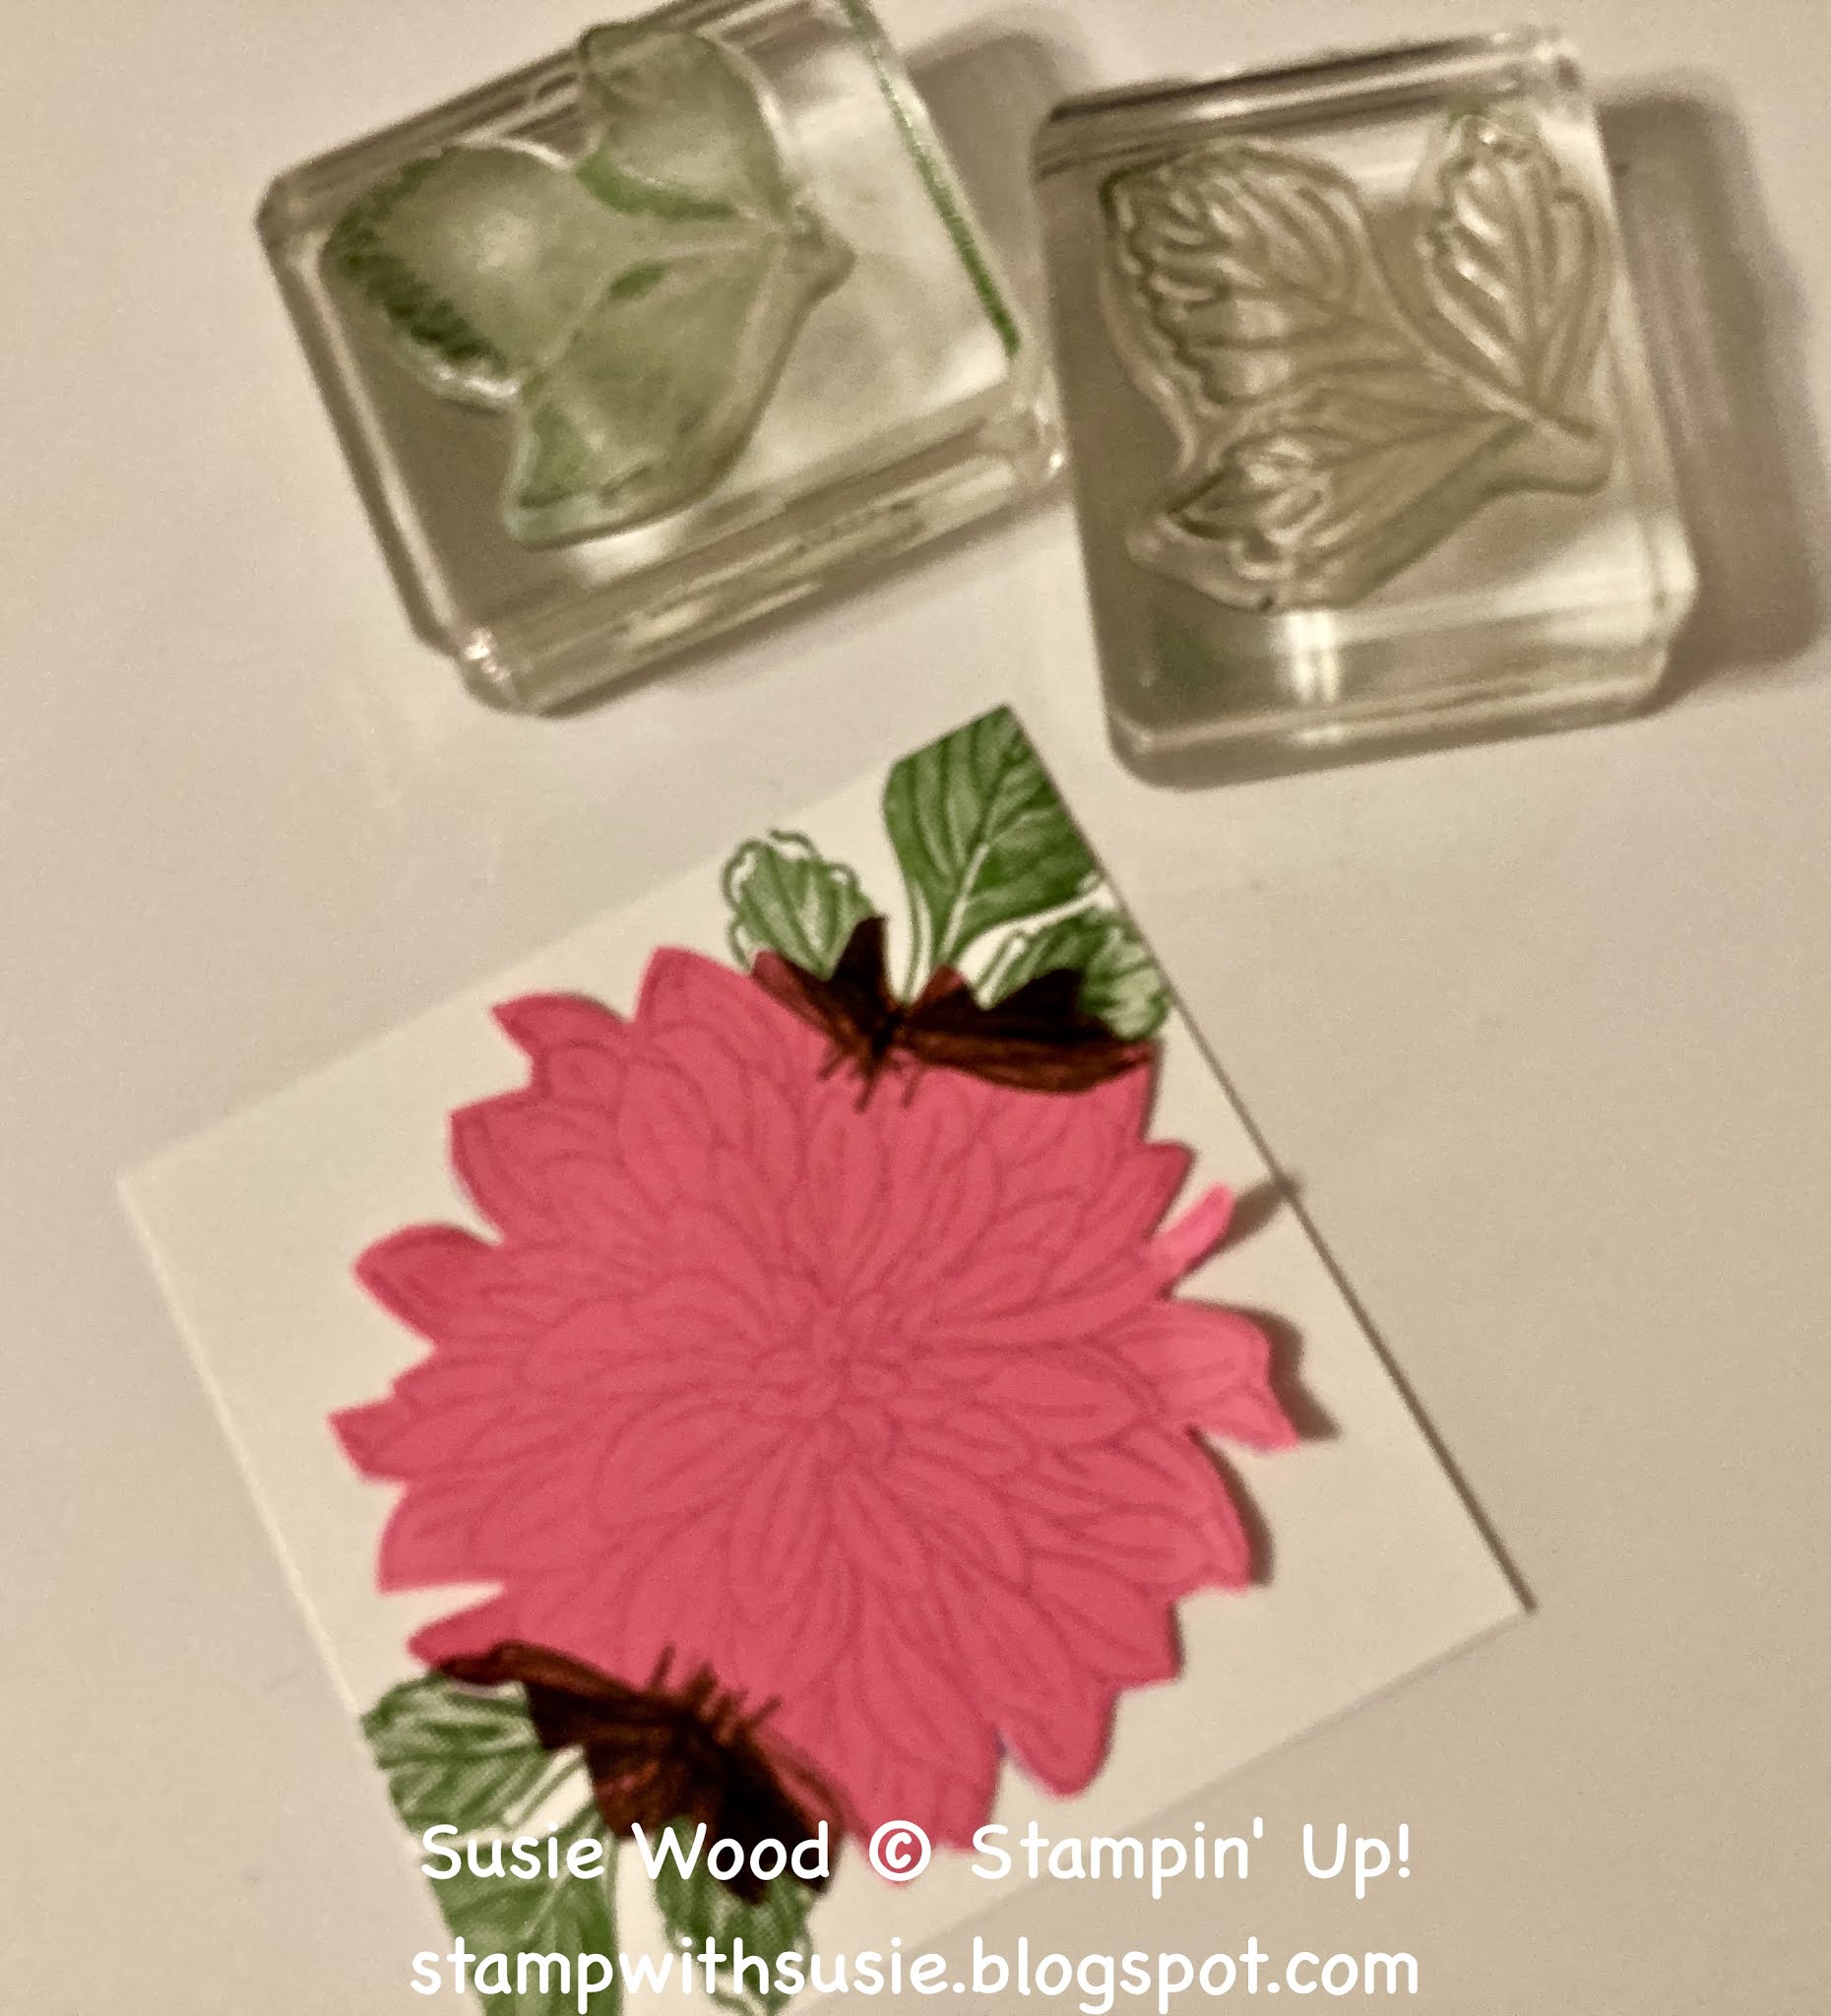
I colored this card with the Stampin' Blends.
I used the Light & Dark Polished Pink and 
the Light & Dark Soft Succulent Stampin' Blends.
This is what it looks like when it is opened up!
So which card do you like better?
The all black & white one or the colored one?
Leave me a comment below & let me know!
 
Here are the supplies & measurements so that you can make this too!
stamp set:  'Shaded Summer'
card stock:
  • Basic Black- 4 1/4 x 8"- score at 5 1/2" for card base
  • Basic Black- 3 x 3"
  • Basic Black- 2 1/2" x 2 1/2"- diagonal cut & use for corner latch.  You'll adhere the DSP to this.  I suggest that you add the DSP directly over the top of this & diagonally cut them together.  I am having you add the card stock behind the DSP to make it sturdier.  You'll have 2 of these, so you can use the other one & make another corner latch card.
  • Basic White- 2 3/4 x 2 3/4"
  • Basic White- 2 3/4" strip- stamp flowers/leaves onto & die cut out
  • Basic Black- 1 1/2" strip- punch out scalloped oval 
  • Basic White- 1 1/2" strip- stamp words & punch out with oval punch
  • Basic White- 3 3/4 x 5"- for inside of card
designer paper:  Beautifully Penned DSP- Sale-a-bration choice- FREE with a $50 product order
  • 2 1/4 x 4"
  • 2 1/2 x 2 1/2"- layer onto top of Basic Black card stock & diagonally cut.  You'll have 2 of these- so you can use it on another card (or make 2 of these cards at one time)!
ink:  Memento
Stampin' Blends:  Light & Dark Polished Pink; Light & Darn Soft Succulent
other:  Stampin' Cut & Emboss Machine; Summer Shadow Dies- Sale-a-bration choice- FREE with a $100 product order; Black & White 1/4" Gingham Ribbon; Double Oval Punch; dimensionals; glue dots; Wink of Stella

I hope you have TERRIFIC Tuesday!!
Happy Stamping!
Hugs-
SUSIE

Monday, August 9, 2021

Penguin Place with Penguin Playmates DSP!

 It is Sale-a-bration time!
And this Penguin Playmates DSP is one of the choices that you can
get for FREE with a $50 product order.

I cut out the penguin & the little tree from the DSP!
And combined the 'Penguin Place' stamp set with it for the
snowflakes & the words.
 Check out the gorgeous snowflake & ribbon!
They can be found in the Holiday Mini Catalog-
  • #156340-Wonderful Snowflakes= $6.00- pg. 25 
  • #156408- White 3/8" Glittered Organdy Ribbon= $8.50- pg. 37
 This is what it looks like opened up!
It is a little different fold.
Here are the measurements & the supplies.
stamp set:  'Penguin Place'
card stock:  
  • Misty Moonlight-4 1/4 x 8 1/2"- score at 5 1/2" for card base
  • Fresh Freesia- 3 3/4 x 5"
  • Basic White-2 5/8" x 1 3/4" piece that I cut waves into, flipped the pieces & made drifts for the snow
  • Basic White- 1/2" strip- stamped words & flagged end with Banners Pick A Punch.  Then cut to 1 1/4" long.
  • Basic White- 4 x 5 1/4"- for inside of card
designer paper:  Penguin Playmates DSP- A Sale-a-bration choice & FREE with a $50 product order
  • cut out penguin with my scissors
  • cut out tree with my scissors
  • 2 x 4" stripes
ink:  Fresh Freesia
other:  Paper Snips; White 3/8" Glittered Organdy Ribbon; Wonderful Snowflakes; Banners Pick A Punch; dimensionals; glue dots
 
I hope you have a MARVELOUS Monday!!
Happy Stamping!
Hugs-
SUSIE

Sunday, August 8, 2021

Beautifully Penned Designer Paper

 A quick card using the Beautifully Penned DSP!
This DSP is a Sale-a-bration choice that you can get for FREE
when you place a catalog product order of $50.

You all know that I love black & white cards.
Now how fun is this!
 
I used these NEW products-
I combined the 'Thinking Thanks & Peace' stamp set
& the cool Black & White Gingham Ribbon with this card!
 Check out these flowers!
They are so pretty just left black & white!
BUT I could have colored them using my Stampin' Blends....
I'll have to do that & share with you tomorrow!
Aren't these big words from the 'Thinking Thanks & Peace' stamp set great!
 
Here are the supplies & measurements.
stamp set:  'Thinking Thanks & Peace'
card stock:
  • Basic Black- 5 1/2 x 8 1/2"- score at 4 1/4"- fold in half for card base
  • Basic Black-3 1/2" strip- die cut scalloped circle
  • Basic White- 3 1/4" strip- die cut circle
  • Basic White- 4 x 5 1/4"- for inside of card
designer paper:  Beautifully Penned DSP- FREE Sale-a-bration Choice
  • 2 x 5 1/4"
  • 3 x 4"
ink:  Memento
other:  Stampin' Cut & Emboss Machine; Layering Circle Dies; Black & White Gingham Ribbon; Elegant Faceted Gems; dimensionals; glue dots
 
I hope you have a SUPER Sunday!!
Happy Stamping!
Hugs-
SUSIE

Saturday, August 7, 2021

Simple Saturday with Counting Sheep

 It is SIMPLE Saturday!
And I have an adorable black & white card using the 
'Counting Sheep' stamp set.
 
This stamp set is a Sale-a-bration choice that you can get for
FREE with a $50 product order.

And check out the stripped DSP!
It is from the Beautifully Penned DSP & is also a 
Sale-a-bration choice that you can get for FREE with a $50 product order.
I tried to keep this simple.....but ended up adding a few things.
  • Elegant Faceted Gems
  • Stampin' Blends- Light Basic Black & Light Old Olive
  • Label Me Lovely Punch
  • Baker's Twine Essential Pack (Black)
It is those little things that just pull everything together!
And I love the way this card turned out!
Here are the measurements & supplies.
stamp set:  'Counting Sheep'- SAB choice- FREE with a $50 product order
NOTE:  This stamp set has a coordinating Sheep Dies that you can also get as a FREE Sale-a-bration choice, but I didn't use the dies when creating today's card.
card stock:
  • Basic Black- 4 1/4 x 8 1/2"- score at 5 1/2" for card base
  • Basic Black- 3 1/4 x 3 1/4"
  • Basic White- 3 x 3"- stamp sheep, grass & words onto
  • Basic Black- 2" strip- use Lovely Label Punch to make tab
  • Basic White- 3 3/4 x 5"- for inside of card
designer paper:  Beautifully Penned DSP- 4 x 2 3/4"- SAB choice- FREE with $50 product order
ink:  Memento
Stampin' Blends:  Light Basic Black & Light Old Olive
other:  Lovely Label Punch; Baker's Twine Essential Pack (Black); Elegant Faceted Gems
 
I hope you have a SPECTACULAR Saturday!
Happy Stamping!
hugs-
SUSIE

Friday, August 6, 2021

Peguin Place Fun Fold

 So cute!
And so fun!
Check out this adorable little penguin.
This is from the 'Penguin Place Bundle!
I just used the Penguin Builder Punch to make him.

And check out the cool plaid Black & Red DSP!
It is a Sale-a-bration choice from the Peaceful Prints DSP,
 that you can get for FREE with product orders of $50!
This is what it looks like when opened up! 
I made another inside pop up card similar to this, using the Peaceful Deer Bundle.
 
You'll make a little box to put underneath the circle dies/penguin 
so that they will pop up when you open up the card.
Here are the measurements for the box & the pop-up tab.
This is what the little box & tab look like from the side view
when adhered to the inside of the card.
Here are the pieces to make the penguin.
1.  Punch out solid image of penguin from Basic Black card stock.
2.  Stamp inside penguin body onto Basic White card stock & punch it out.
3.  Stamp hat & scarf onto Basic White card stock & cut out with scissors.
4.  Punch out feet with Mango Melody card stock.
5.  Adhere together!
Here are the supplies & measurements.
stamp set:  'Penguin Place'
card stock for the outside of the card:
  • Basic Black- 4 1/4 x 11"- score at 5 1/2"- for card base.  Die cut circle into the center of this.
  • Real Red- 3 1/4" strip- die cut circle
  • Basic Black- 3 1/4" strip- die cut scalloped circle
  • Basic White- 2 3/4" strip- die cut circle- stamp trees into the upper right top/corner.  Draw hills using your Garden Green Stampin' Write Marker.
  • Basic Black- 2" strip- punch out penguin body
  • Basic White- 2" strip- stamp penguin inside box piece with Memento ink & punch out
  • Mango Melody- 1/2" strip- punch out feet
  • Basic White- 1" strip- stamp hat & scarf using Real Red ink & cut out with scissors
  • Real Red- 1/4 x 3 1/4" strip- layer under words on front of card
  • Basic White- 1/2 x 3 1/4"- stamp words onto & punch ends with the Banners Pick A Punch
  • Basic White- 4 x 4"- for inside of card
  • Basic Black- 2 1/4 x 4 1/4"- score at 1/4", 1", 2", 3", 4".  Make box to adhere to center inside of card.
  • Basic Black- 3/4 x 2"- score at 1" - fold in half for tab
designer paper:  Peaceful Prints- 1 1/2 x 4"
ink:  Memento, Real Red, Garden Green
Stampin' Write Marker:  Garden Green
other:  Stampin' Cut & Emboss Machine; Layering Circle Dies; Penguin Builder Punch; Black Matte Dots; Banners Pick A Punch; Penguin Builder Punch; Real Red 3/8" Sheer Ribbon; dimensionals; glue dots; Simply Score Scoring Tool

I hope you have a FABULOUS Friday!!
Happy Stamping!
Hugs-
SUSIE

Thursday, August 5, 2021

Pretty Pumpkins Bundle fall card


This is the 'Pretty Pumpkins' Bundle!
I love the words in this stamp set!
 
I combined some other new products with this 'Pretty Pumpkins' Bundle too
when I was making this card.
  • Cork Specialty Paper
  • Brushed Metallic Adhesive-Backed Dots
  • Merriest Frames Hybrid Embossing Folder/Die
  • Harvest Meadow DSP
  • Timeworn Type 3D Embossing Folder
This is what it looks like opened up.
Here are the supplies & measurements.
stamp set:  'Pretty Pumpkins'
card stock:
  • Crumb Cake- 5 1/2 x 7 1/2"- score at 4 1/4"- for card base
  • Mossy Meadow- 4 1/4 x 5 1/2"- die cut foliage
  • Crumb Cake- 1 1/2" strip- stamp words & cut around with scissors
  • Pumpkin Pie-2 3/4" strip- stamp pumpkins & die cut
  • Mossy Meadow- stamp leaves onto & cut out with scissors
  • Crumb Cake- stamp pumpkin stems & cut out with scissors
  • Basic White- 2 1/2 x 5 1/4"- for inside of card
designer paper: 
  • Cork Specialty Paper- 1/4 x 2 3/4"; 1/2 x 5 1/2"
  •  Harvest Meadow DSP- 2 x 2 3/4"; 1 x 5 1/2"
ink:  Memento
Stampin' Blends:  Dark Mossy Meadow & Dark Pumpkin Pie
other: Stampin' Cut & Emboss Machine; Merriest Frames Hybrid Embossing Folder/Die; Timeworn Type 3D Embossing Folder; Detailed Pumpkins Dies; Brushed Metallic Adhesive-Backed Dots; dimensionals; scissors; linen thread; glue dots
 
I hope you have a GREAT Thursday!!
Happy Stamping!
Hugs-
SUSIE

Wednesday, August 4, 2021

Delicate Dahlias

Here is another totally Susie card.
Check out this awesome dis'ink'tive stamp set called- 'Delicate Dahlias'.
It is one of the Sale-a-bration choices that
you can get it FREE with a $100 product order.
I think that this flower is just gorgeous! 
 
There are no dies with this 'Delicate Dahlias' stamp set-
so I fussy cut out all of these flowers & leave with my scissors.
But I do like to cut things out though!
If you don't like to fussy cut things out-
 keep on reading & see how you can do the "masking technique".
This is what my card looks like when opened up!
  This a fun accordion z fold card! 
 
The Garden Green DSP is also a Sale-a-bration choice.
It is from the Peaceful Prints 12x12 DSP pack
that is FREE with a $50.00 product order.
I made all of these cards for a swap that I participated in with 
some other demonstrator friends.
And I used the 'Delicate Dahlias' stamp set with with it too!
For the flowers I used the Stamparatus so that it was easy to line up
& so that I could mass produce it so much faster!
 
You don't have to fussy cut out this flower.
For this flower I did the "masking technique".
How did I do it?
#1.  Stamp Flower using the Stamparatus.
 
#2.- I used a pink post-it-note, stamped the flower outline onto it 
& then fussy cut it out with scissors.
I put this post-it-note flower directly over the Fresh Freesia flower I stamped.
#3.  I then stamped the leaves.
Notice how I stamped the leaves slightly onto the post-it-note "flower mask".
#4.  This is what the "masking technique" flower looks like when finished.
It is really cool huh!
By doing the stamping with the "masking technique" way- 
it looks like the leaves are behind the flower.
 
Both of the flower/leaves are very pretty!
Which one do you like better?
Here are the supplies & measurements.
stamp set:  'Delicate Dahlias'
card stock:
  • Garden Green- 4 1/4 x 5 1/2"- base
  • Garden Green- 5 1/4 x 11"- score at 1 3/4", 3 1/2", 5 1/4", 7"
  • Garden Green- 3 1/4 x 6 1/2"- score at 3 1/4" & fold in half 
  • Basic White- 3 x 3"
  • Basic White- 3 x 3"- stamp flower onto this & fussy cut out
  • Basic White- 2" strip- stamp leaves onto this & fussy cut out
  • Basic White- 3 3 4/ x 5"- for inside of card
designer paper:  Peaceful Prints DSP- 1 1/2 x 5" (x2)
inks:  Fresh Freesia & Garden Green
other:  Stamparatus; Paper Snips; Simply Scored Scoring Tool; Genial Gems; Wink of Stella; dimensionals

I hope you have a WONDERFUL Wednesday!!
Happy Stamping!
Hugs-
SUSIE

Tuesday, August 3, 2021

NEW Catalogs START TODAY!!

 WOO HOO!
The Holiday Catalog (July-January 2021)- starts today!
You can CLICK BELOW to download this catalog!
This catalog starts 8/3/21 & ends 1/3/22!    
 
And the Sale-a-bration Catalog starts today too!
This catalog starts 8/3/21 & ends 9/30/21.
For every $50 in products you spend (before shipping & tax),
you get to choose of the items in this catalog for FREE!
You can CLICK BELOW to download this catalog.
 
Contact me if you need help ordering or have any questions!
 
Here is the August Host Code-
DBSHJSV2

Peaceful Deer Bundle Fun Fold

 Here is a totally Susie card!
I LOVE this NEW Peaceful Deer Bundle!
IT just makes me smile.
My head just spins with ideas using it!
And the Deer is a PUNCH!
WOO HOO!!

This is a really cute fun fold card.
The center circle flips up & shows on the inside of the card when it is opened up.
Isn't this so cool!
++++++++++++++++++++++++++++++++++++++
So how did I do it?

#1.  Die cut circle window in card front.  
SAVE this piece as you'll use to layer the other circles/deer onto later.  
 #2.  Stamp words onto the lower part of the inside Basic White cardstock & then adhere to inside of card.


#3.  Make a box like this & add adhesive to the 1/4" strip & put together to form a box.

This is a 2 1/4 x 4 1/4" strip- score at 1/2", 1", 2", 3" & 4".

Here is the pattern you'll need to make the box above!
#4.  Adhere the box to the inside of the card as shown above.  
Put the box in the CENTER & close to the center fold of the card. 
Have the adhesive on it downward onto the Basic White card stock that is the inside base piece. 
 
#5.  You'll add adhesive along the lower part of the inside card front & then close the card.  
The card front will now be stuck down to the box top! 
 
#6.  I added the DSP strips & words onto the card front.
 #7.  Now you'll put adhesive on a little tab you make- like shown here on the right side.
 This is the pattern for the tab you'll need.
It is 3/4 x 2" & score it in half at 1".
#8. You'll fold the tab in half & adhere it down onto the box top.  
Make sure that the TOP (open) end of the tab is up & adhere it to the middle/top part of the box as shown here above.
You'll now add a piece of adhesive to this tab (on the top side) too!
*So yes- BOTH folded sides of this tab have adhesive onto them.

#9.  You'll put the 3 circles together.
With the card shut- you'll adhere the circle pieces to the center tab that is on the box top shown in the photo above for step #8.
#10.  You'll then add the deer. 
#11.  Your card is complete!
Here are the supplies & measurements.
stamp set:  'Peaceful Deer'
card stock:
  • Old Olive- 5 1/2 x 8 1/2"- score at 4 1/4"- fold in half for card base.  Cut circle out of center front of this piece.  Save circle to layer other circles onto & reattach later to fit into card front "window".
  • Basic White- 4 x 5 1/4"- for card inside.  Stamp words on lower part of this & adhere to inside of card.
  • Old Olive- 2 1/4 x 4 1/4"-  score at 1/4"; 1", 2", 3"; 4".  Add adhesive to the 1/4" scored piece to make a box. 
  • Old Olive- 3/4 x 2"- score at 1"- fold in half
  • Crumb Cake- 3 1/4" strip- die cut scalloped circle
  • Basic White- 2 3/4" strip- die cut circle.  Stamp trees onto this.
  • Crumb Cake- 2" strip- stamp deer onto & punch out.
  • Crumb Cake- 1/4 x 3 1/4"- attach along bottom center of card front.
  • Basic White- 1/2 x 3 1/4"- stamp words in center & flag ends with the Banners Pick A Punch
dsp:  Heartwarming Hugs DSP- 1 x 4" (x2)
inks:  Old Olive & Memento
other:  Stampin' Cut & Emboss Machine; Layering Circle Dies; Deer Builder Punch; Banners Pick A Punch; Subtle Shimmer Sequins; dimensionals; glue dots; Simply Scored Scoring Tool
 I made several of these cards for a swap I did with some demonstrator friends!

I hope you have a TERRIFIC Tuesday!!
Happy Stamping!
Hugs-
SUSIE

Monday, August 2, 2021

Susie's Holiday Catalog Product Share

Susie's Holiday Catalog Product Share

Single Designer Paper Share – (60) 6″ x 6″ sheets of the papers listed

  • Gingerbread & Peppermint (12)
  • Painted Christmas (6)
  • Whimsy & Wonder (6)
  • Sweet Stockings (6)
  • Peaceful Place (6)
  • Blackberry Beauty (6)
  • Cute Halloween (6)
  • Harvest Meadow (6)
  • Heartwarming Hugs (6)

Cost of Share = $19 + $8 Priority Shipping*

I have included all of the ribbon from the July-December Mini Catalog for a total of 22 1/2 yards. I will cut the ribbon from each spool into four equal shares. This will amount to approximately 2 1/2 yards (90″) of each.

  • Real Red 3/8″ Mini Ruffled Ribbon
  • Cherry Cobbler & Gold 1/2″ Ribbon
  • Blushing Bride 3/8″ Frayed Grosgrain Ribbon
  • Real Red 3/8″ Sheer Ribbon
  • Pool Party 3/8″ Striped Grosgrain
  • White 3/8″ Glittered Organdy
  • Gold 3/8″ Shimmer Ribbon
  • Black & White 1/4″ Gingham Ribbon
  • 3/8″ Diamond Weave Ribbon

Cost of Share = $19 + $4 First Class Shipping*

BEST DEAL= I want it ALL= $38.00 PLUS you'll get these SAB DSP as a bonus!

  • Penguin Playmates (6) – from SAB
  • Beautifully Penned (6) – from SAB
  • Peaceful Prints (6) – from SAB

* If buying ribbon and paper shares, total shipping charge will be $8 for Priority Mail.

No shipping charge added when you pick up these from me!

 I will be ordering products for these shares tomorrow 8/3/21!

Be sure you contact me right away if you want these!


Peaceful Cabins with Soft Pastel Chalks

 This is a totally Susie card.
I used lots of new products from the upcoming Holiday Catalog here.
I love the way this card turned out! 
I used the 'Peaceful Cabin' Bundle!

Look closely at the trees.
How did I color them?
I stamped them onto a piece of Basic White card stock, using Mossy Meadow Ink.
I then colored them with a Sponge Dauber using my Soft Pastel Chalks.
 I then cut out the trees like this!
And adhered them back onto a piece of Basic White card stock.

Look at how the card looks when it is opened up!
 It is a center gate fold card.
Notice how I added the Wintery 3D (snowflake) Embossing Folder to the top flap.
Did you notice the NEW Cork Specialty Paper?
Oh my gosh....it is pretty cool!
 
Here are the measurements & the supplies.
stamp set:  'Peaceful Cabins'
card stock:
  • Mossy Meadow- 7 1/4 x 5 1/2"- score at 1 1/2" & 5 3/4"
  • Crumb Cake- 1 5/8 x 5 1/2"
  • Crumb Cake- 3 x 4"
  • Basic White- 2 3/4 x 3 3/4"- stamp trees onto & die cut
  • Basic White- 2 3/4 x 3 3/4"- layer trees onto
  • Basic White- 1" strip to die cut little stars
  • Basic White- 1/2" strip- stamp words onto & flap end with Paper Snips
  • Basic White- 4 x 5 1/4"- for inside of card
designer paper:  Cork Specialty Paper- 1 x 5 1/2"
ink:  Mossy Meadow
other:  Stampin' Cut & Emboss Machine; Cabin Dies; Wintery 3D (Snowflakes) Embossing Folder; Soft Pastel Chalks; Rhinestones; dimensionals; glue dots; Linen Thread; Paper Snips

I hope you have a MARVELOUS Monday!!
Happy Stamping!
Hugs-
SUSIE

Sunday, August 1, 2021

Peaceful Deer Sneak Peek!

This is a totally Susie card!
 
You all know that I'm a punch girl!
AND I LOVE Fall!
So I am totally in love with this 'Peaceful Deer' Bundle!
It includes the stamp set & coordinating Deer Builder Punch.
 
Look at the row of trees.
They too are a punch called Evergreen Border Punch & are on page 147 in the Annual Catalog. 

WOW- NEW products I used here-
  • Peaceful Deer stamp set
  • Deer Builder Punch
  • Subtle Shimmer Sequins
  • Timber 3D Embossing Folder
  • Heartwarming Hugs DSP
Here are the supplies & measurements.
stamp set:  'Peaceful Deer'
card stock:
  • Old Olive- 5 1/2 x 8 1/2"- score at 4 1/4"- fold in half for card base
  • Crumb Cake- 4 x 5 1/4"- emboss with the NEW Timber 3D Embossing Folder
  • Old Olive- 3 1/4" strip- die cut circle
  • Crumb Cake- 3 1/4" strip- die cut scalloped circle
  • Basic White- 2 3/4" strip- die cut circle
  • Crumb Cake- 2" strip- stamp deer onto & punch out
  • Basic White-  1/2" strip- stamp words & diagonally cut ends
  • Old Olive-1 1/2" strip- punch out trees
  • Basic White- 4 x 5 1/4"
designer paper:  Heartwarming Hugs DSP- 3 3/4 x 1"
inks:  Memento & Old Olive
other:  Stampin' Cut & Emboss Machine; Timber 3D Embossing Folder; Layering Circle Dies; Deer Builder Punch; Subtle Shimmer Sequins; Linen Thread; dimensionals; glue dots
 
I hope you have a SPECIAL Sunday!!
Happy Stamping!
Hugs-
SUSIE